 DIATwin
R03 | Automatic Configuration Across the Whole Panel
Purpose and expected result
Use Flattened panel with Demo_Panel so the entire panel is planned together. Do not pre-lock accessory slots. Let the algorithm configure resources and generate the flow, then complete simulation.
Before you start
Use EmptyInsertionMachine and the standard Demo_Panel. Start without pre-locking Feeder or Tool slots.
Example values and adjustable items
| Item | Example value | Adjustment principle |
|---|---|---|
| Mode | Flattened panel | Core setting for this task |
| Processing scope | 16/16 Designators | All retained in the example |
| Fiducials | 2 points | One shared pair for the whole panel in this example |
| Lock | No pre-locked slots before planning | Do not apply R02's empty-slot constraints. |
| Result | 24.672 seconds | Value for this case, not a fixed passing threshold |
Procedure
Step 01 | Create a recipe
Select Recipe → Create Project. Choose the empty machine and Demo_Panel, then NEXT.
Check after the operation: Product Assembly opens.
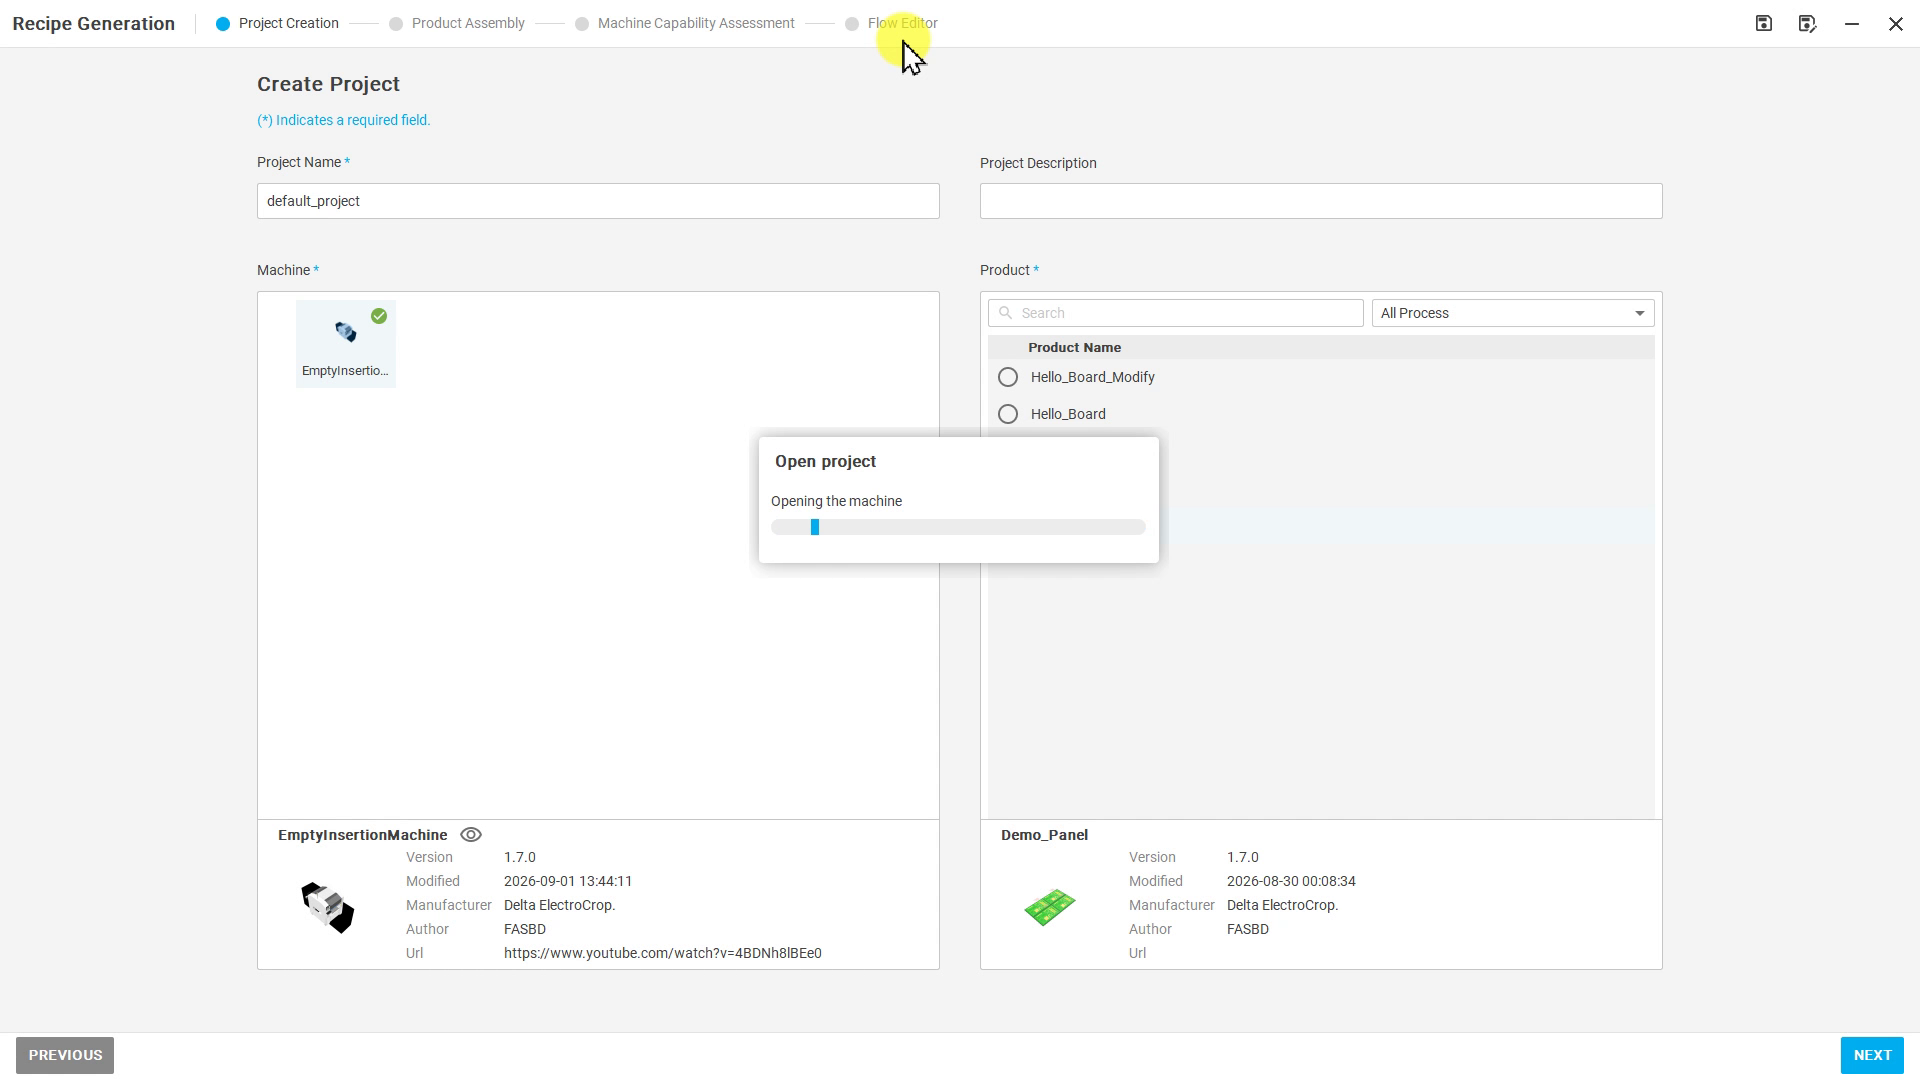
Figure R03-01: Create a recipe
Step 02 | Set assembly conditions
Select L2R and CONFIRM. Check the default orientation and Attachment Point. Set conveyor width to 350 mm, select CONFIRM, then NEXT.
Check after the operation: Machine Capability Assessment opens.
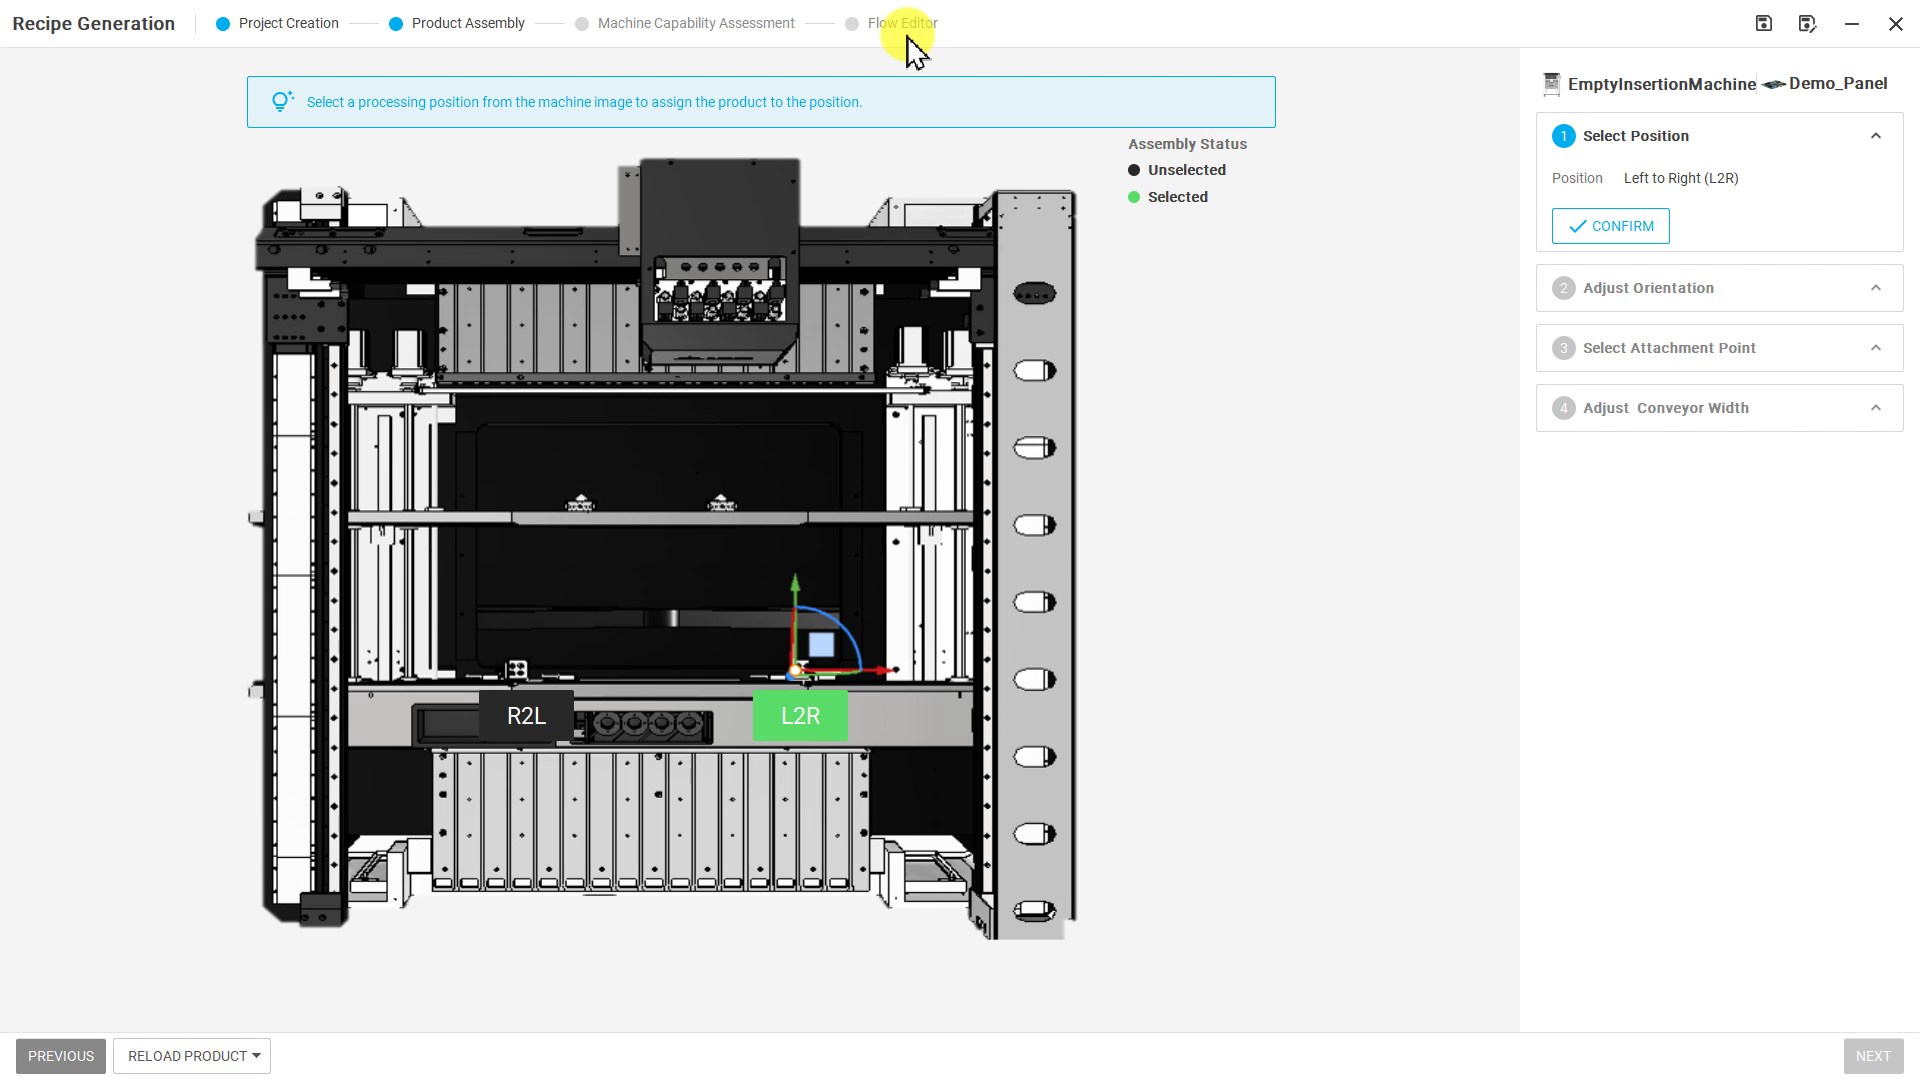
Figure R03-02: Set assembly conditions
Step 03 | Set the whole-panel scope
Switch to Product and select SELECT DESIGNATOR FIDUCIALS. Choose Flattened panel, retain 16/16 Designators, check the two fiducials, then select APPLY.
Check after the operation: The entire panel is the planning target.
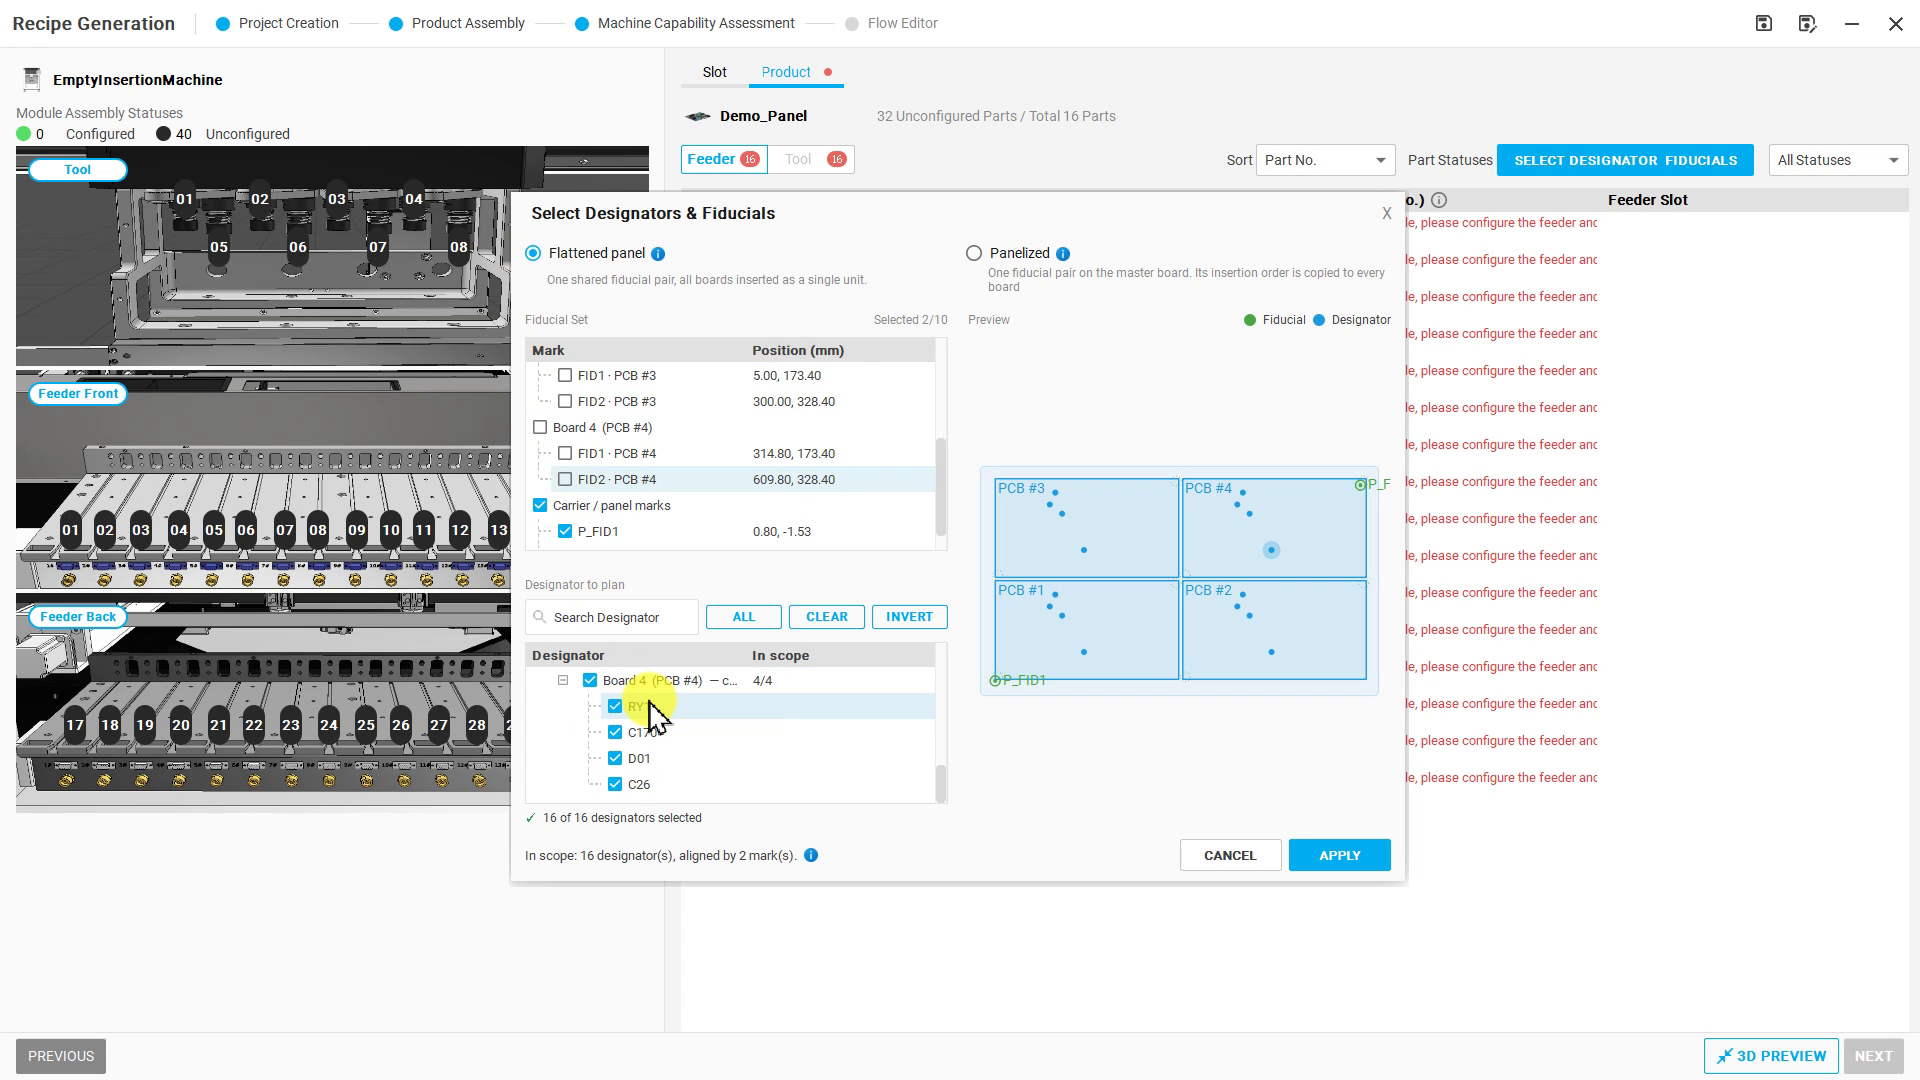
Figure R03-03: Set the whole-panel scope
Step 04 | Check that slots are unlocked
Return to Slot and open Feeder and Tool in turn. Check that no slots are locked; release existing Locks. Make all slots available to the algorithm.
Check after the operation: R02's empty-slot locks are not retained.
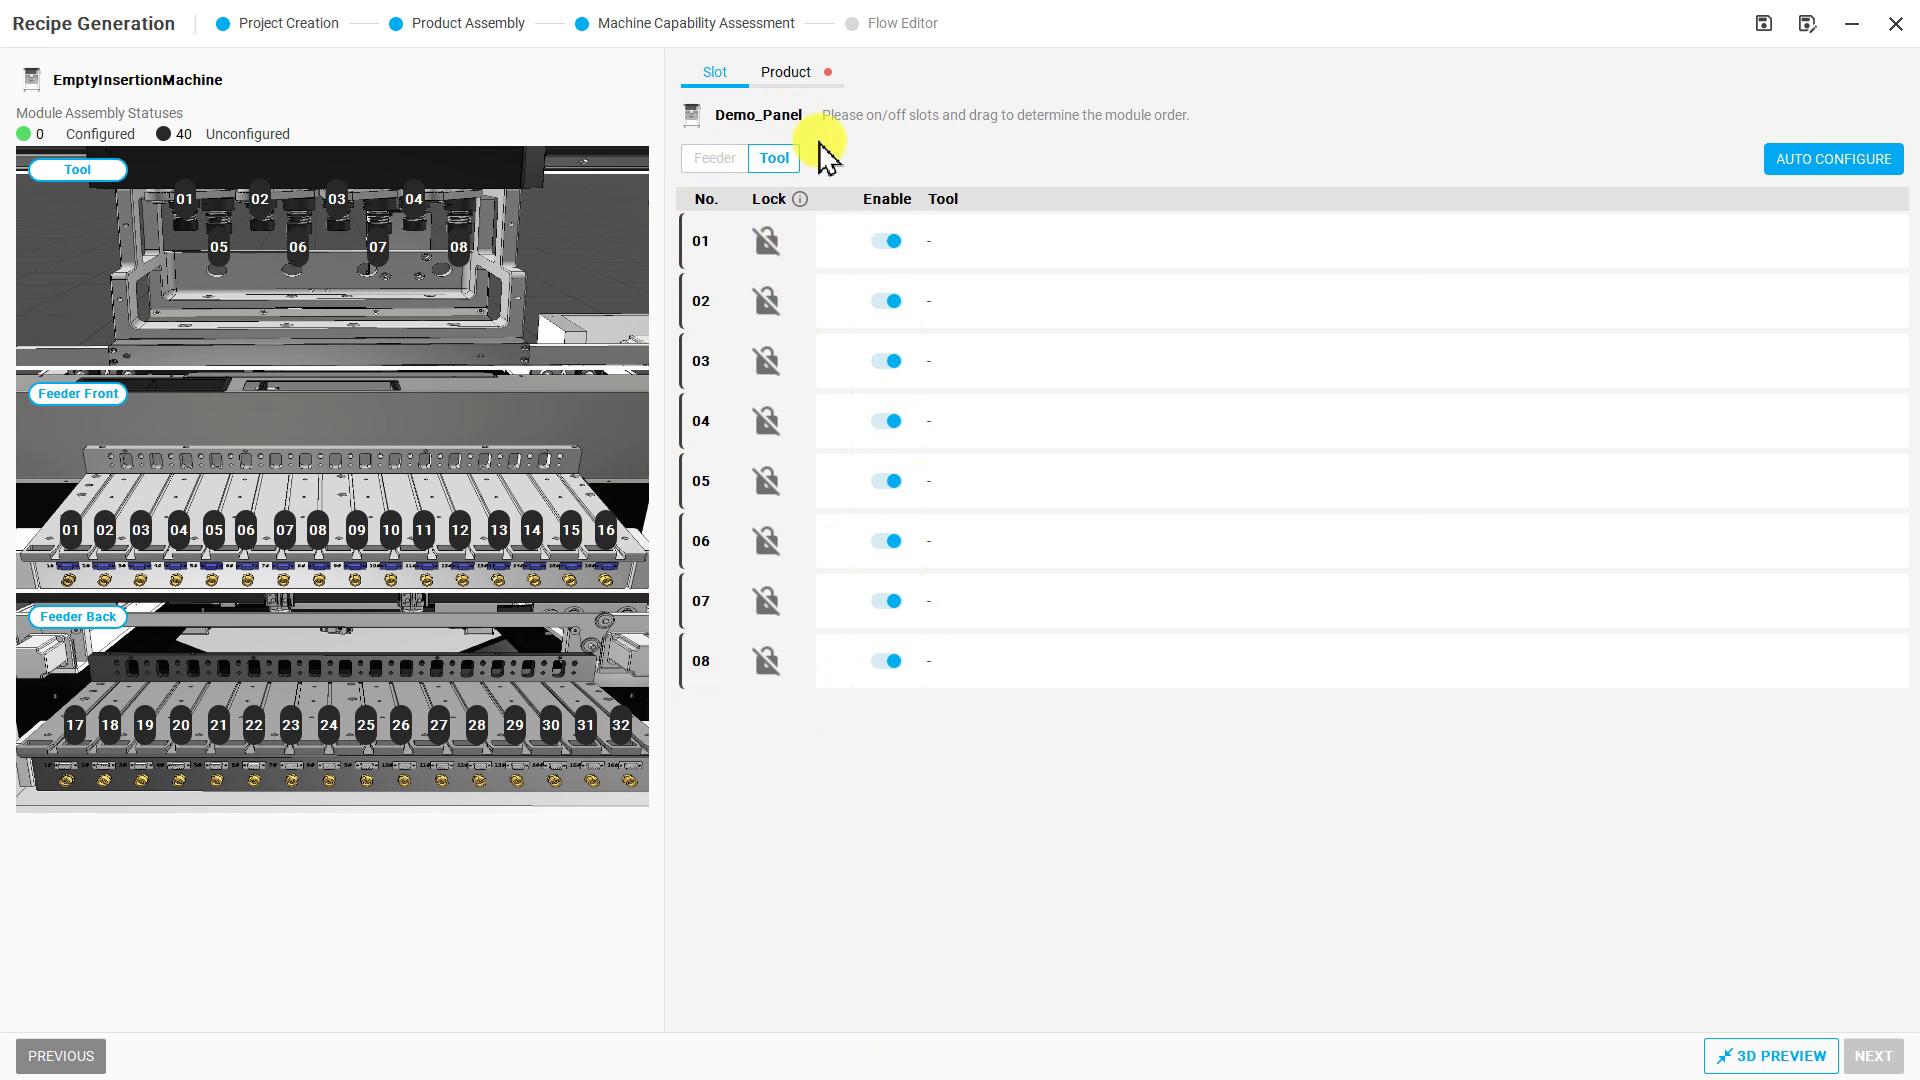
Figure R03-04: Check that slots are unlocked
Step 05 | Start AUTO CONFIGURE
Select AUTO CONFIGURE at the upper right and wait for Auto Configure Modules to finish.
Check after the operation: Executing algorithm or computation progress is visible.
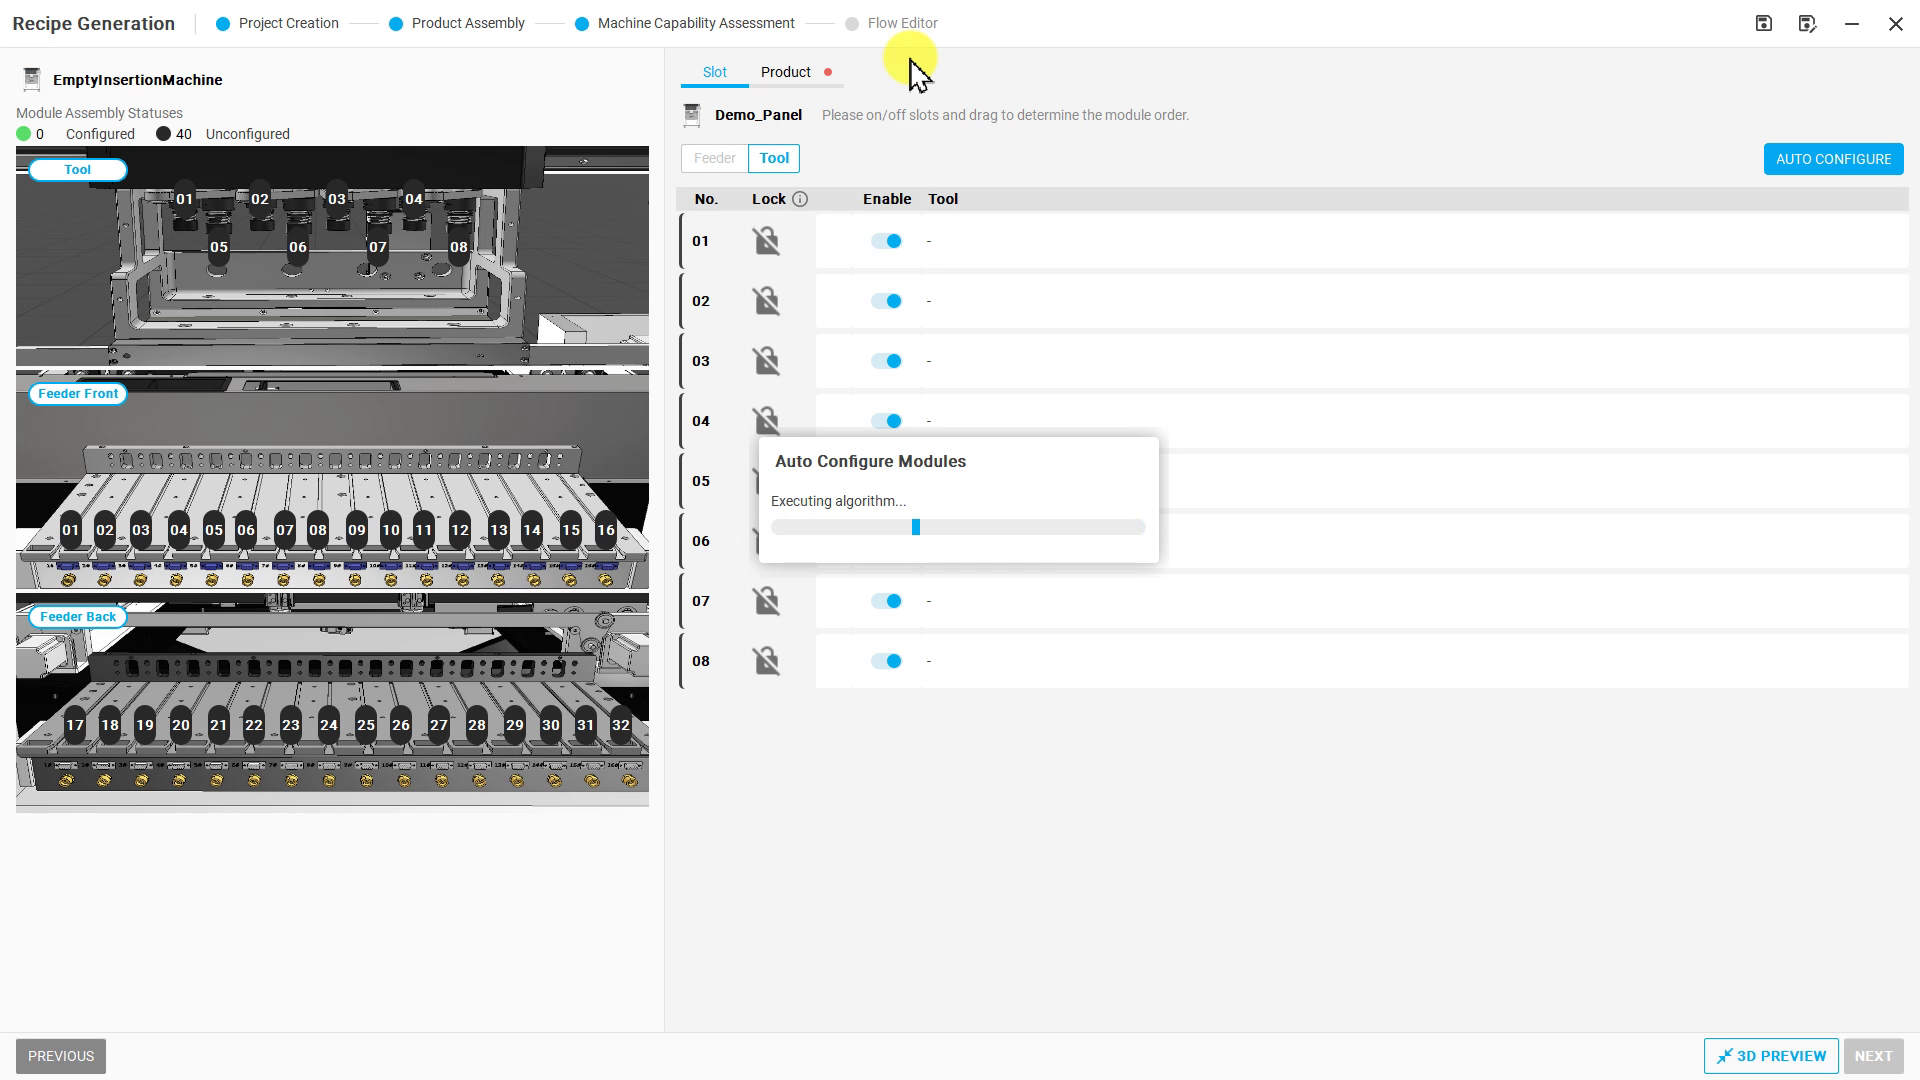
Figure R03-05: Start AUTO CONFIGURE
Step 06 | Check and import the proposal
When Auto Configure Result appears, inspect the Auto-Configured results for Feeder and Tool. Select IMPORT, read the message, then select CONTINUE.
Check after the operation: Accessory installation starts according to the proposal.
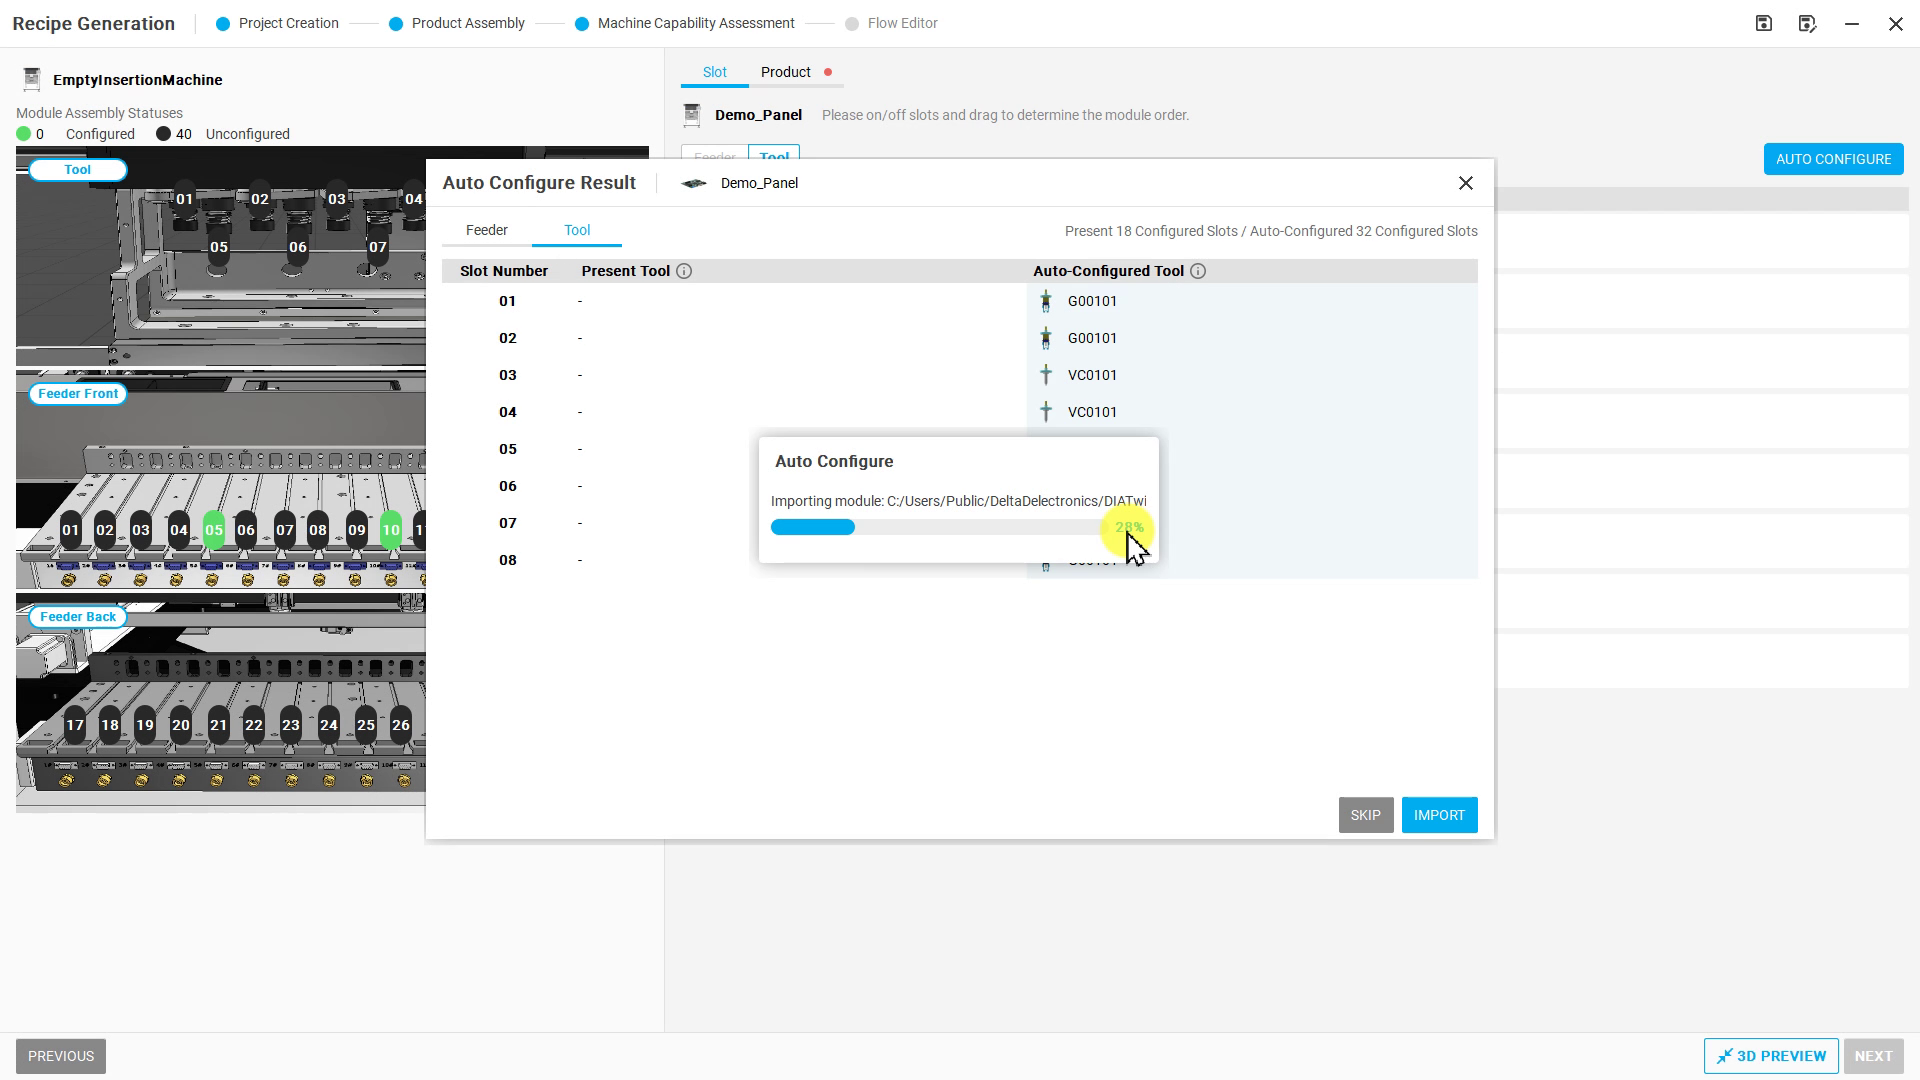
Figure R03-06: Configuration import progress: 28%
Step 07 | Wait for configuration to finish
Monitor Importing module. Wait until configured machine positions are green, required accessories are complete, and NEXT is available.
Check after the operation: Accessories are imported and the next stage is available.
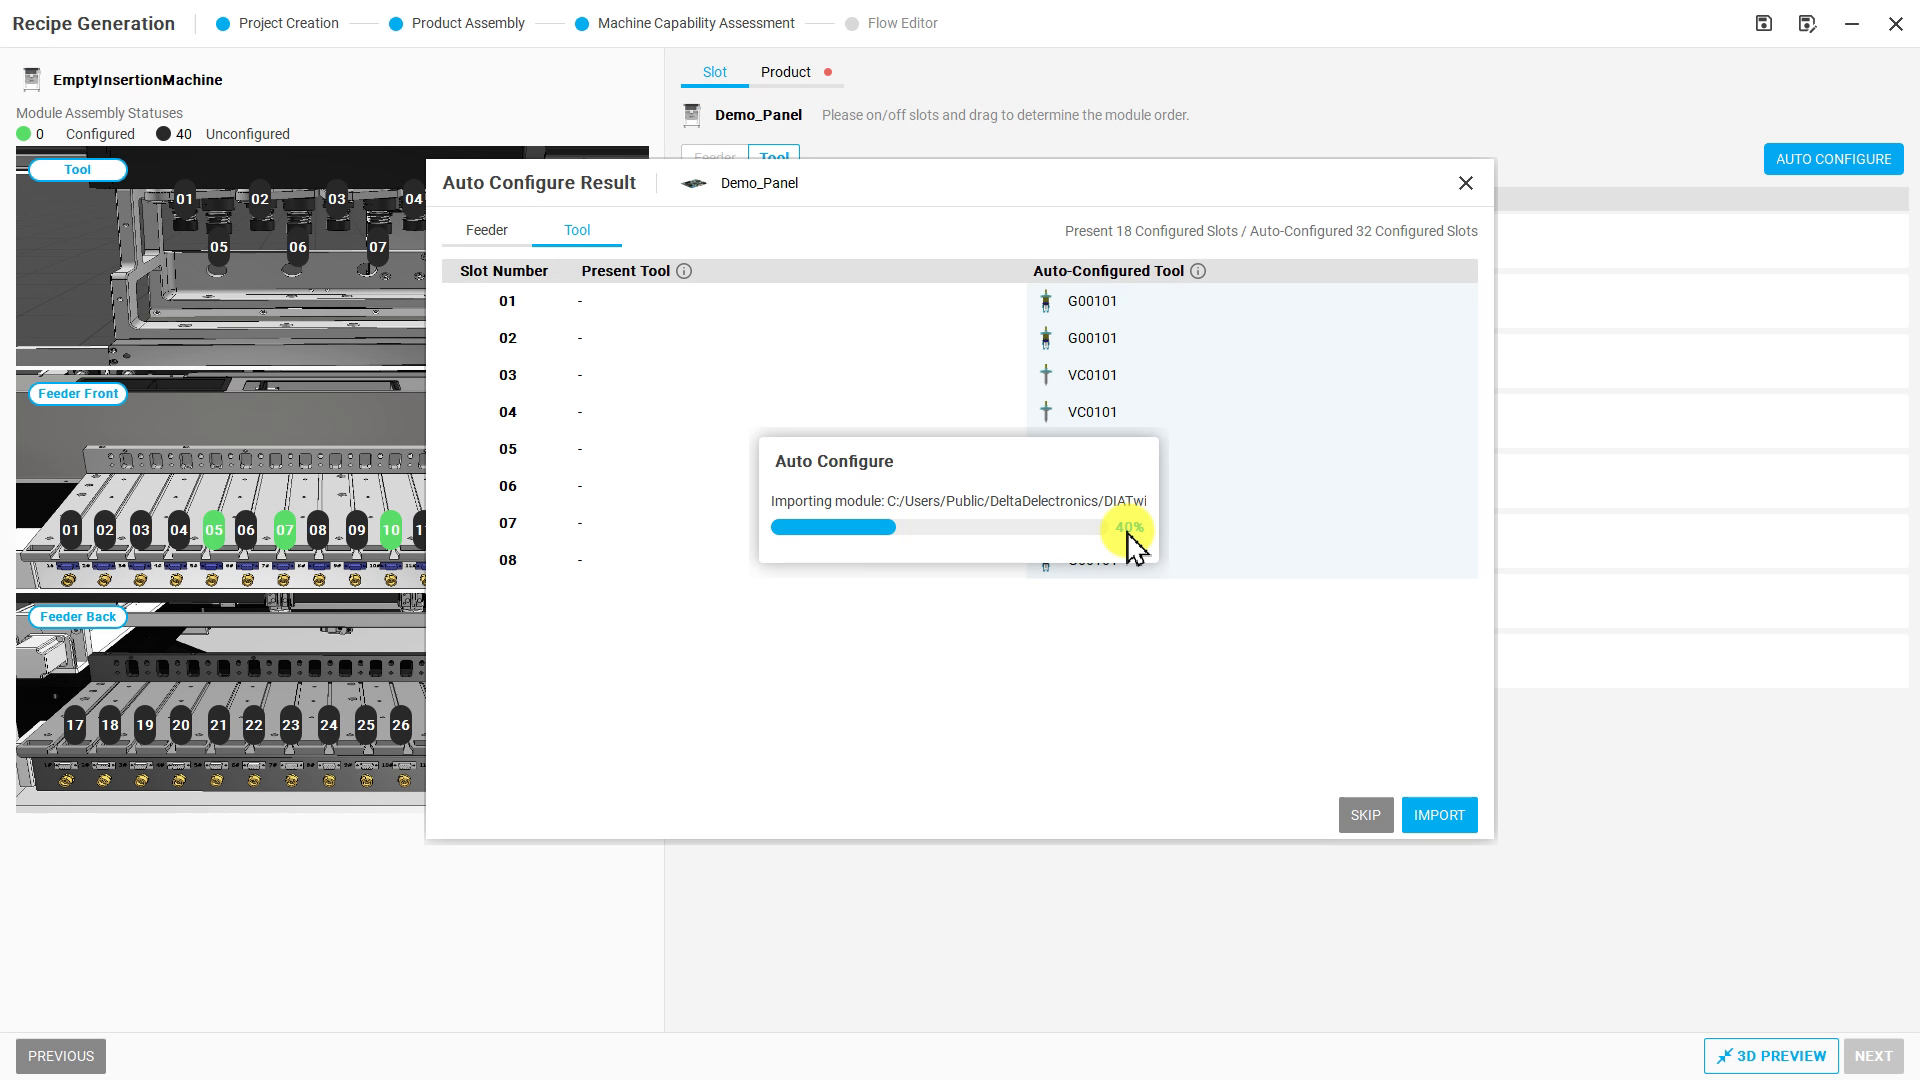
Figure R03-07: Configuration import progress: 40%
Step 08 | View the generated flow
Select NEXT to open Flow Editor. Inspect Designator, Feeder Slot, Tool Slot, and pick-and-place sequence. This flow was generated together with automatic configuration.
Check after the operation: The flow may include Designators from different child boards.
Step 09 | Open simulation
Select RUN SIMULATION, wait for initialization, and confirm START appears.
Check after the operation: Simulation is ready; Cycle Time is 0 before execution starts.
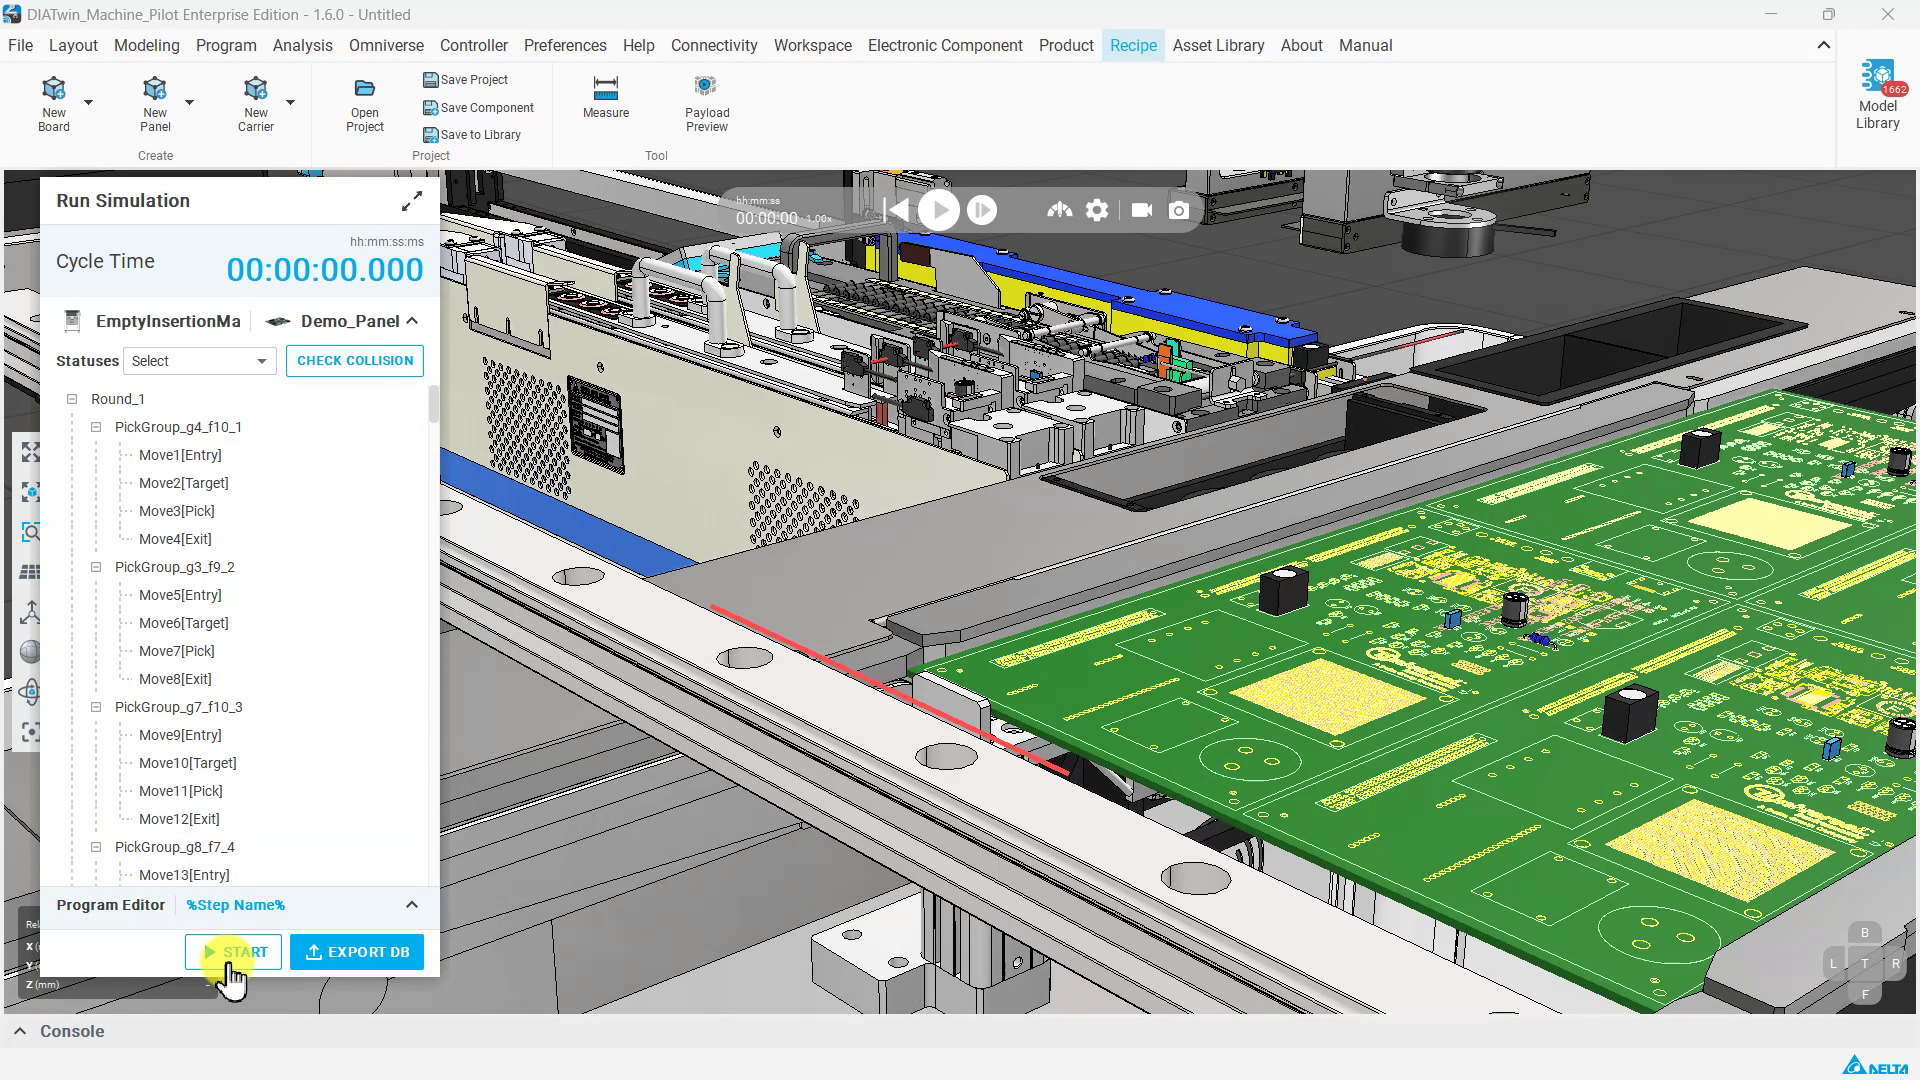
Figure R03-09: Open simulation
Step 10 | Start simulation
Select START. Observe the processing motion and increasing Cycle Time, and wait for all actions to finish.
Check after the operation: Elapsed time during execution is an intermediate reading, not the final result.
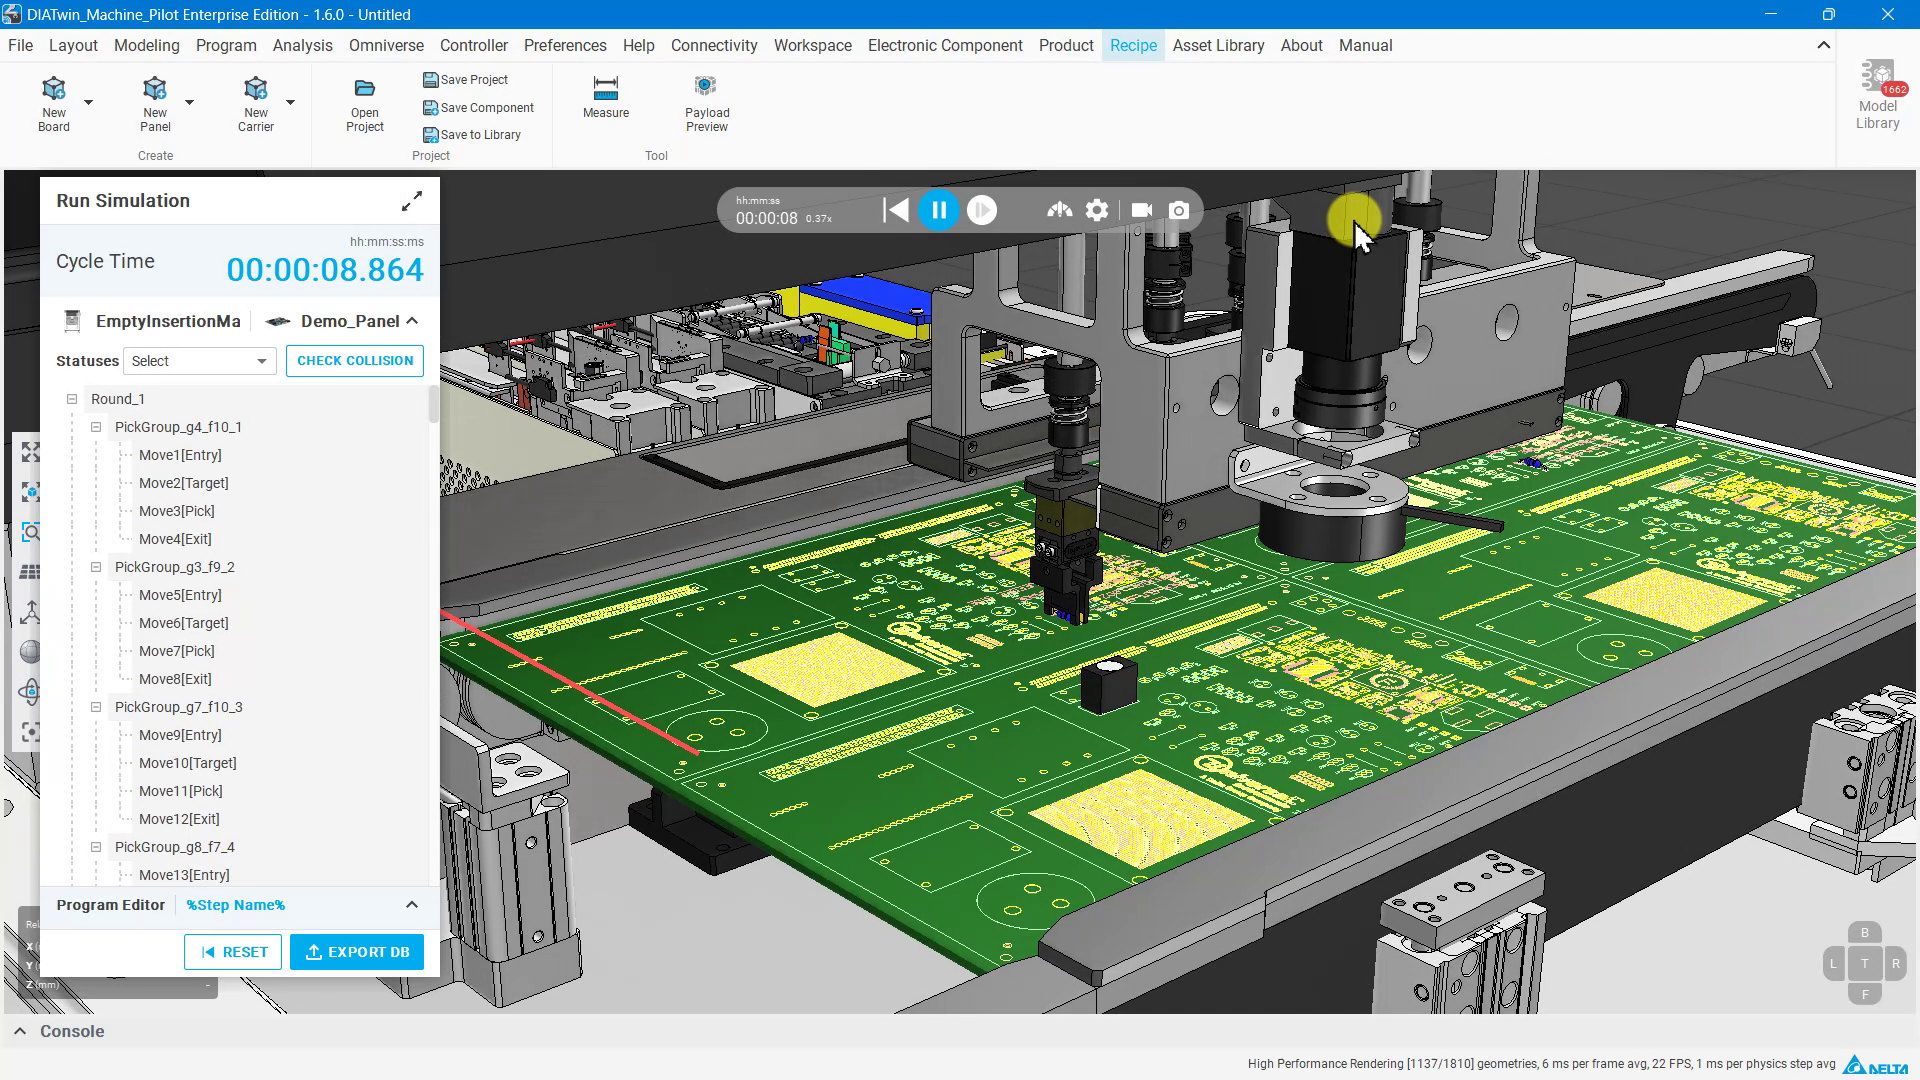
Figure R03-10: Start simulation
Step 11 | Check the completed result for the same case
After confirming simulation is complete, record Cycle Time. The original video holds at 24.672 seconds from 10:58–11:10. Learners record their own result. Identifying EXPORT DB is sufficient.
Check after the operation: The final Cycle Time for the same case is available.
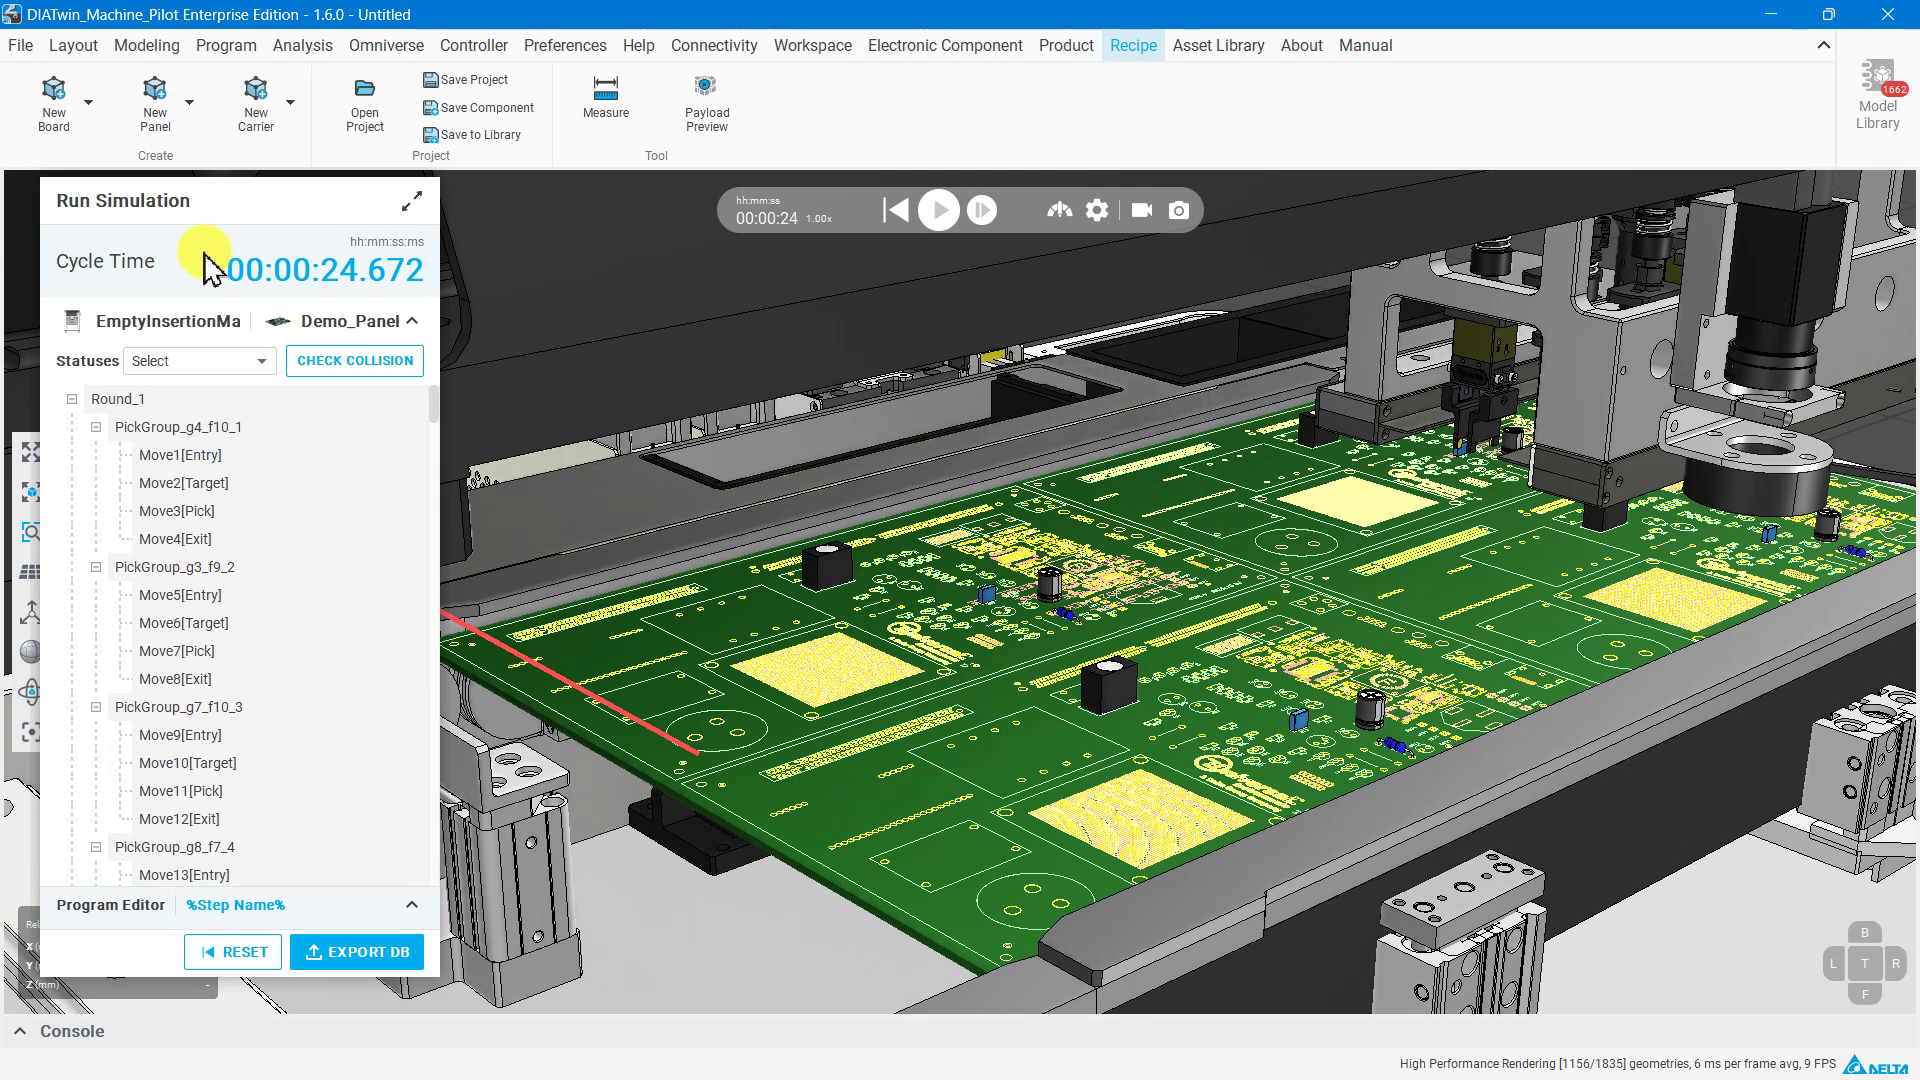
Figure R03-11: View the completed simulation results
Completion checks
- [ ] Flattened panel and the intended processing scope are selected.
- [ ] Feeder / Tool slots were not pre-locked before planning.
- [ ] Algorithm results are imported and the flow is generated.
- [ ] Simulation is complete; Cycle Time can be read and EXPORT DB identified.
Limitations and notes
The example cycle time is 24.672 seconds; actual results depend on the product and configuration. Compare cycle times only with the same machine, product, accessories, and processing settings. Before automatic configuration, confirm that the slots are unlocked as specified in this lesson.