 DIATwin
E01 | Find Components by Shape and Change a Part Number
What will you accomplish?
When you need a component, identify its shape in the asset list, then check the part number. If both match, lookup is complete. If the shape matches but the part number needs changing, update the existing asset's part number and check the result in the list.
This example uses a blue rectangular capacitor and changes its part number from 495-2473-3-ND to 9999 . The completion point is: the same shape is found in UIBU with the new part number .
Before you start
- Open MachinePilot and prepare a component asset suitable for practice edits. The example screenshots use version
1.6.0with an English UI. - Confirm that the example component is in the library. If using another practice asset, record its shape, original part number, and intended new part number first.
- This example opens component search through a new Board's BOM; completed board geometry or annotations are not required.
Before editing, confirm the purpose: one asset has one part number. Changing an existing asset's part number affects definitions that already use that asset. To retain two different part numbers with the same shape, use E02 Deep Clone. Do not repeatedly rename one asset to treat it as two independent assets.
| Item | Example value | May it be changed? |
|---|---|---|
| Component shape | Blue rectangular capacitor | You may use another existing practice shape; verify that the same shape remains before and after editing. |
| Original part number | 495-2473-3-ND |
Use the selected asset's actual value |
| New part number | 9999 |
You may choose your own value; the final result must match it. |
| Name | In this example: 495-2473-3-ND |
Not changed here; do not mistake Name for the updated part number. |
1. Open component search
Step 01 | Add a Board
At the top, in Product select New Board . On the left, verify that Annotation Tree shows Board, containing BOM.
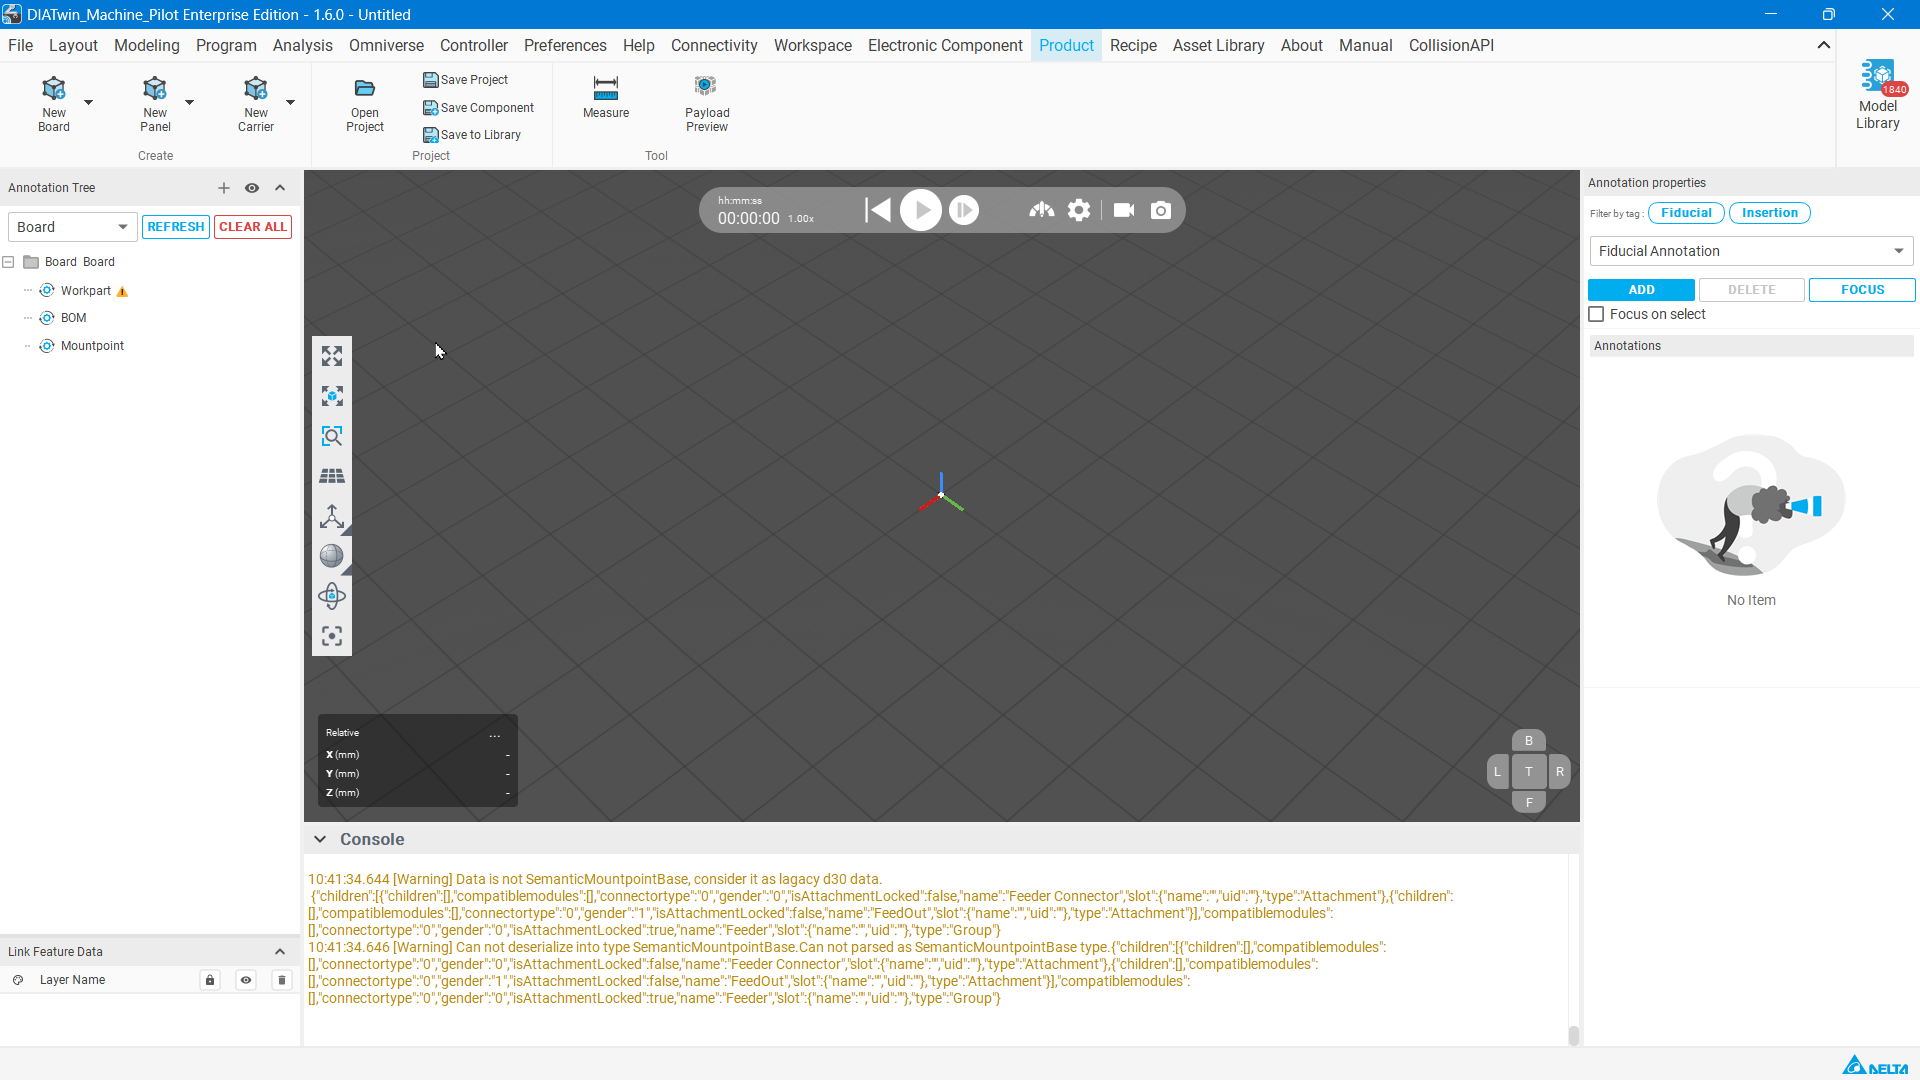
Figure E01-1: Starting state with Board and BOM
Step 02 | Open the BOM list
On the left, in Annotation Tree select BOM . Verify that the right side shows Electronic Component List with the following at the bottom: + ADD.
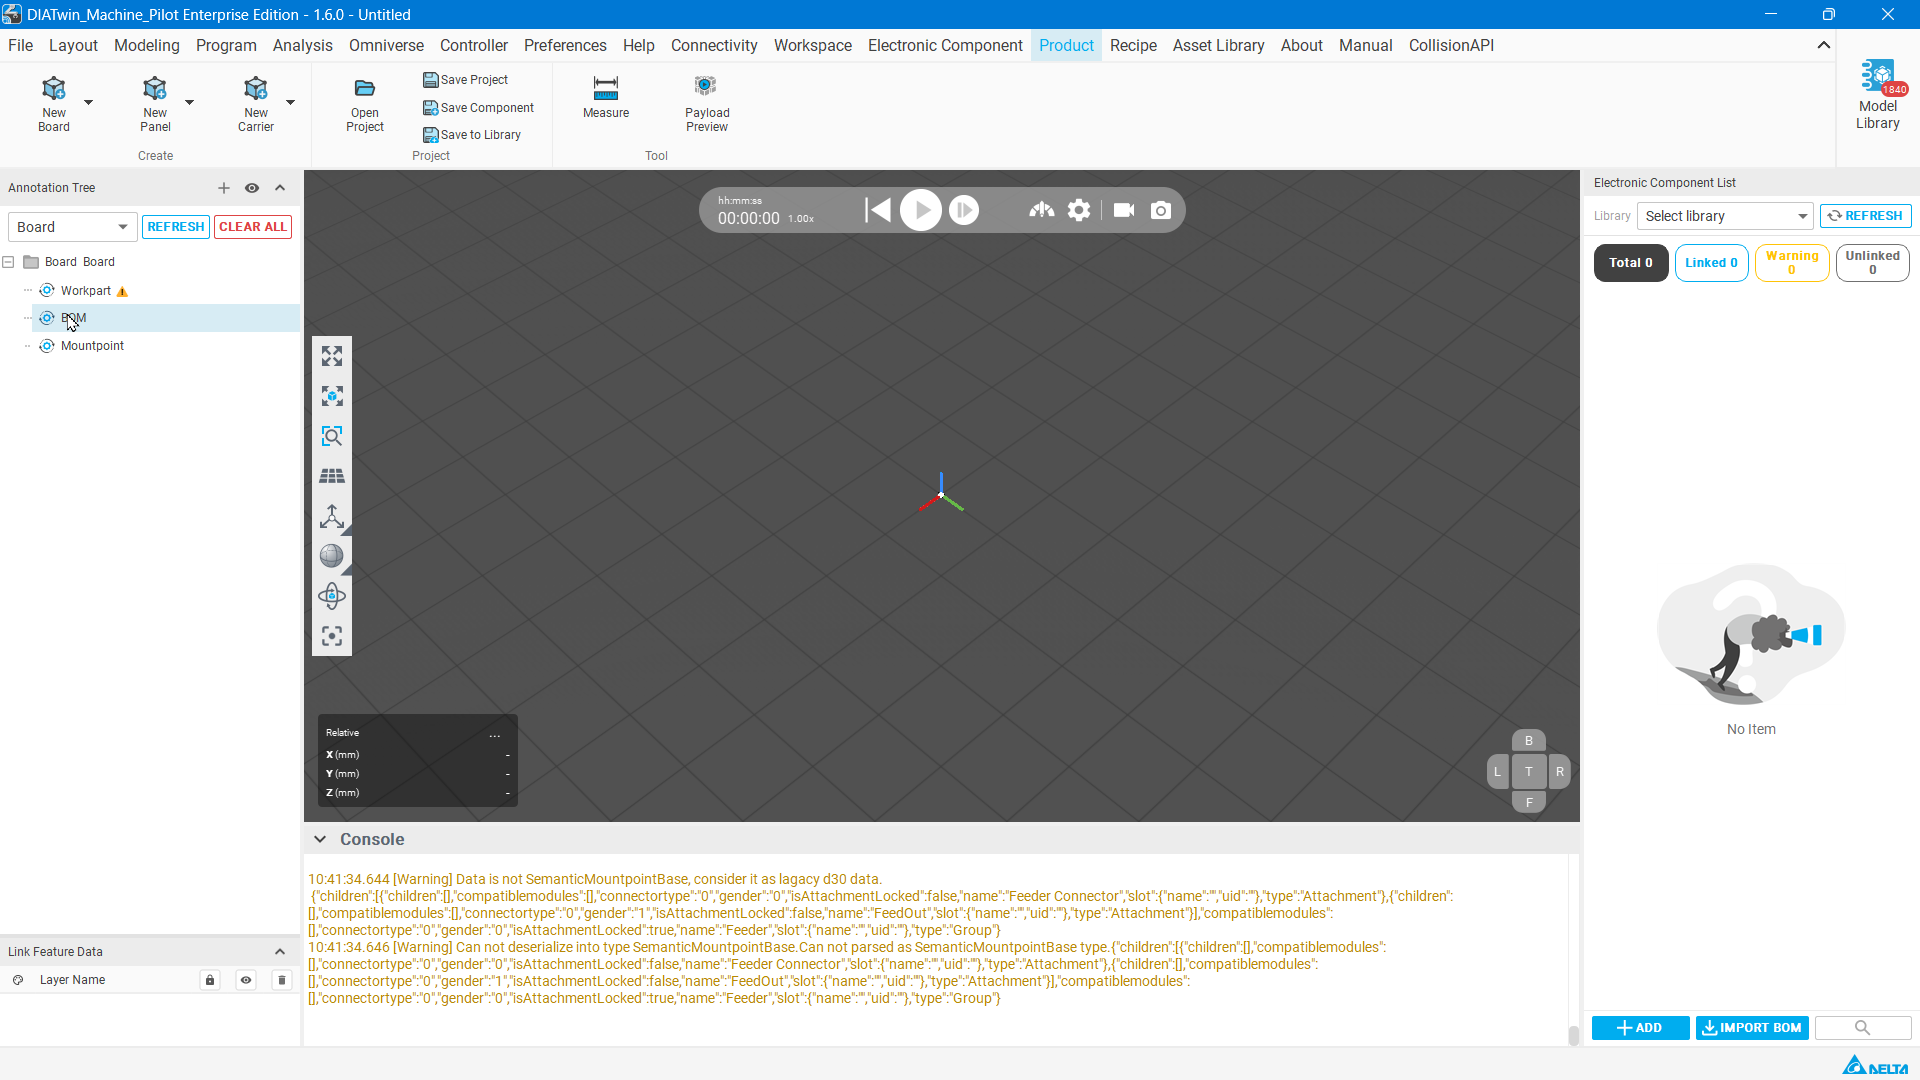
Figure E01-2: The component list is on the right, with the add command at the bottom
Step 03 | Add a component item
At the bottom of the right-hand list, select + ADD . Confirm that the list contains a NEW item whose Part No. field has no component assigned yet.
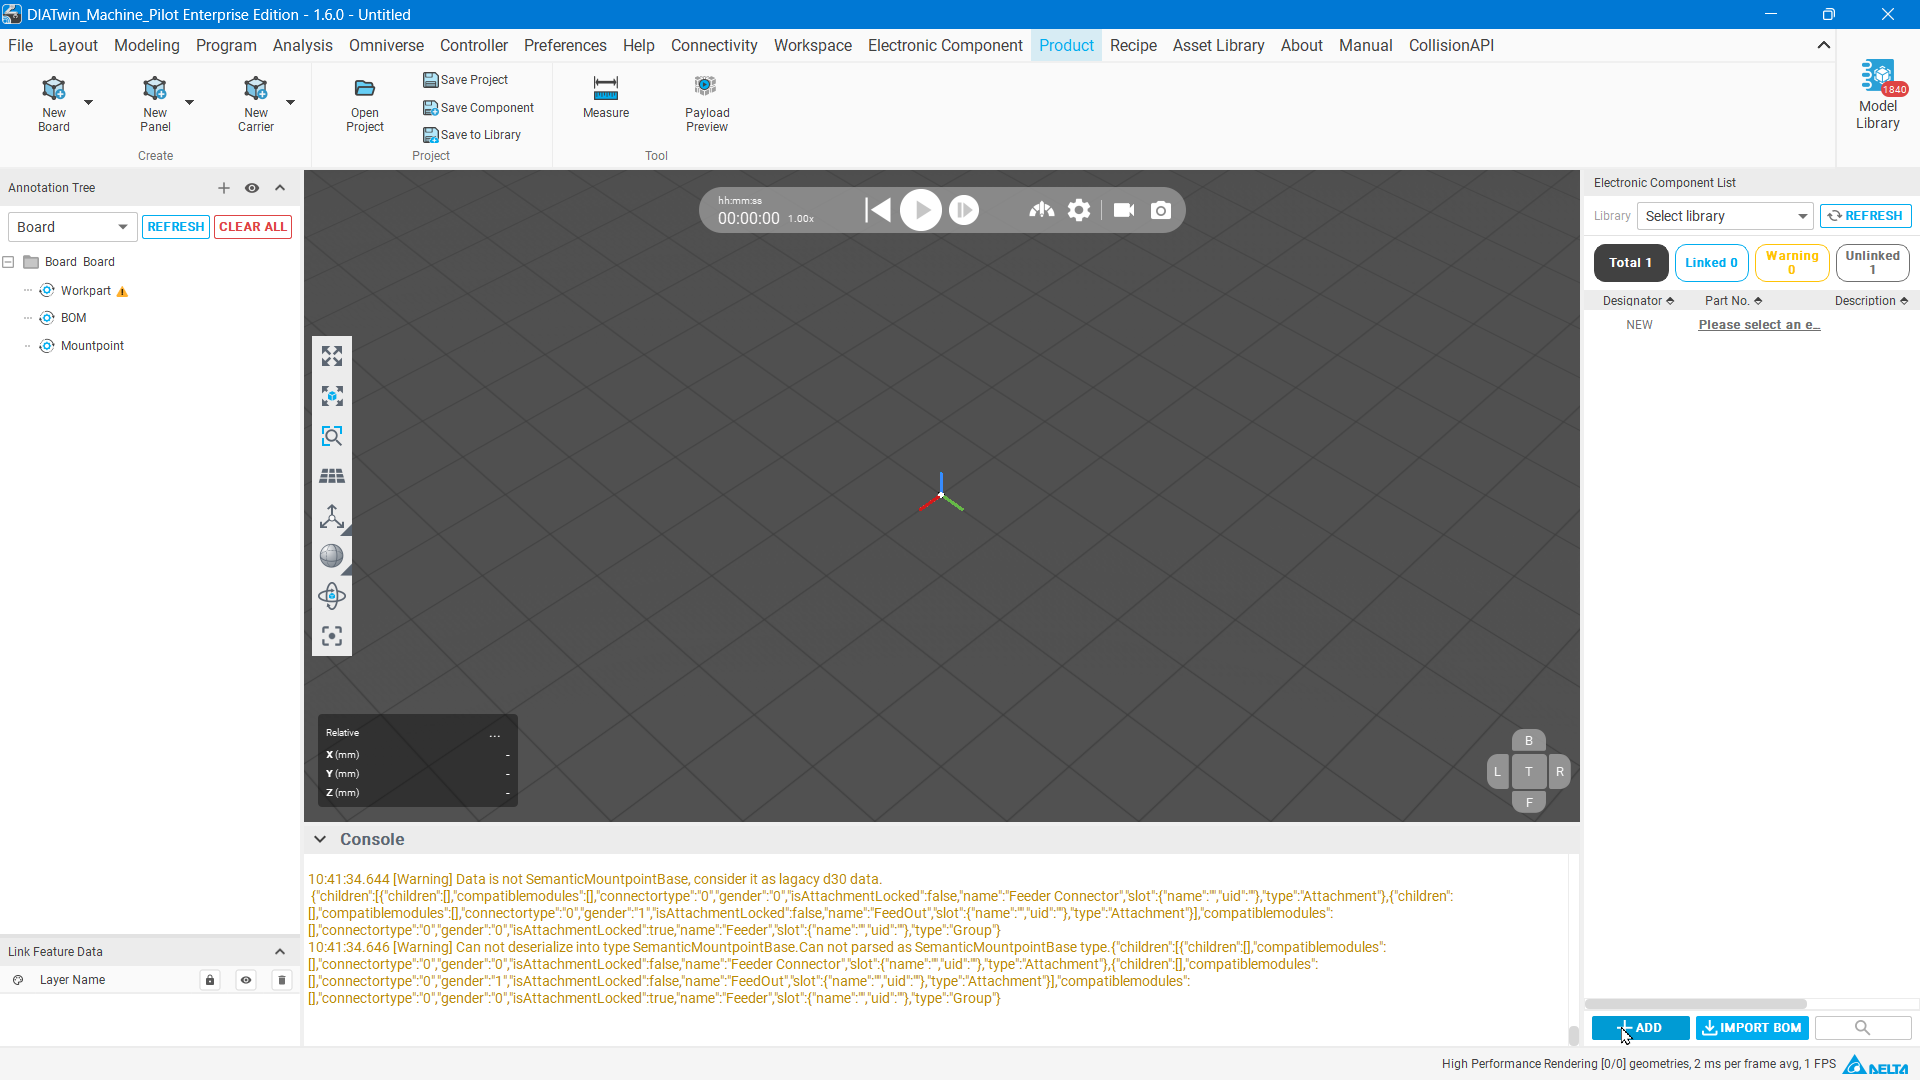
Figure E01-3: After adding an item, Part No. displays an underlined link
Step 04 | Open Component Library Search
Select NEW in that row, select the Part No. underlined text. Because of the column width, it appears as Please select an e... . Confirm that this opens Component Library Search and view the UIBU tab.
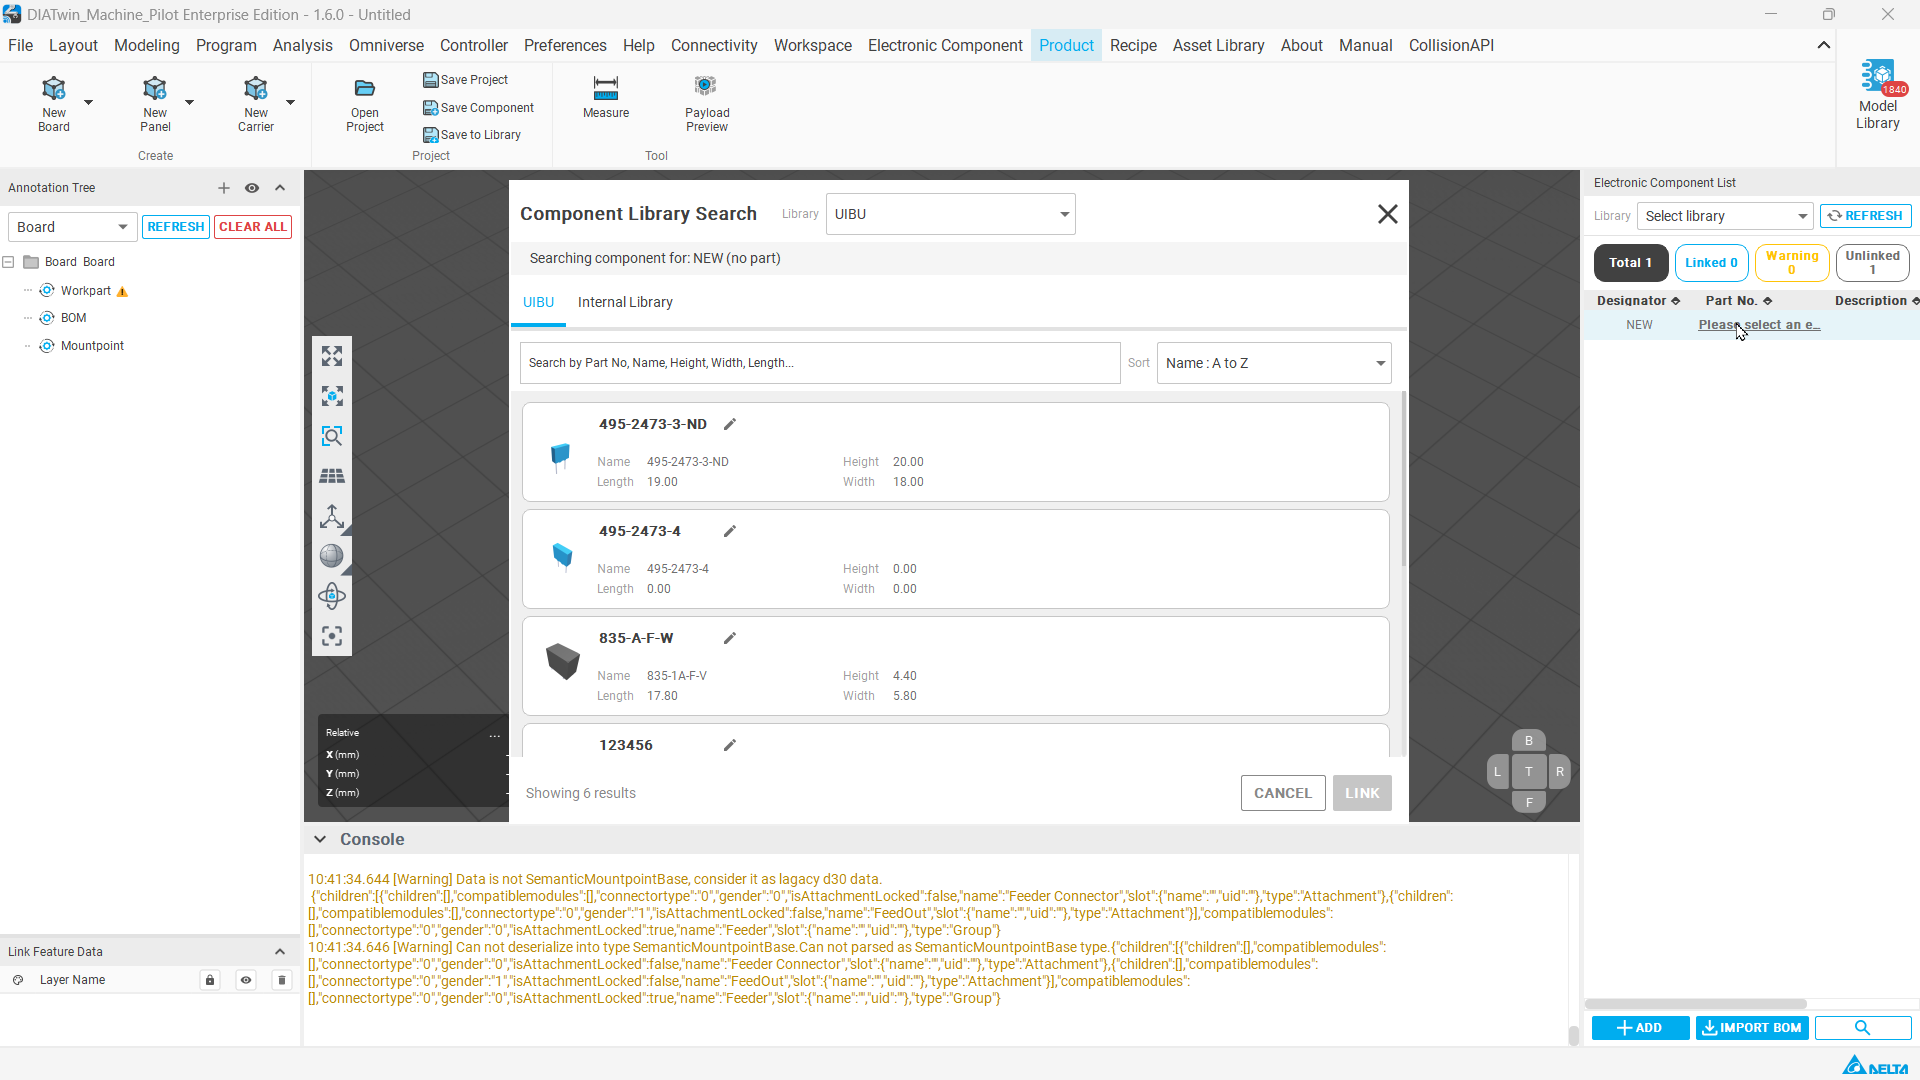
Figure E01-4: UIBU displays shape thumbnails, part numbers, and Name together
2. Identify the shape, then check the part number
Step 05 | Find the required shape
In UIBU browse the shape thumbnails, identify the required shape, then read its part number. The example is the first blue rectangular capacitor in Figure E01-4, with original part number 495-2473-3-ND.
Choose the next action based on your check:
| Check result | Next action |
|---|---|
| Both shape and part number match | The lookup goal is complete; no part-number change is needed. |
| The shape matches, but the part number needs changing and the original does not need to remain independently available. | After understanding the impact, continue to Step 06. |
| The shape is the same, but both old and new part numbers must remain available. | Use E02 Deep Clone instead. |
| The shape does not match. | Consider New Component; creating a new shape is outside E01. |
Steps 06–10 demonstrate changing an existing part number.
3. Change an existing asset's part number
Step 06 | Switch to Internal Library
In Component Library Search At the top, select UIBU on its right, the Internal Library tab, then find the asset with the same shape. Its title in this example is 495-2473-3-ND ; do not select the neighboring 495-2473-4.
Step 07 | Open the part-number input field
On the target asset, select ADD TO UIBU to edit its part number. If the target already shows the Part No. input field and OVERWRITE , continue to Step 08.
Confirm that the target asset's Part No. original value is 495-2473-3-ND.
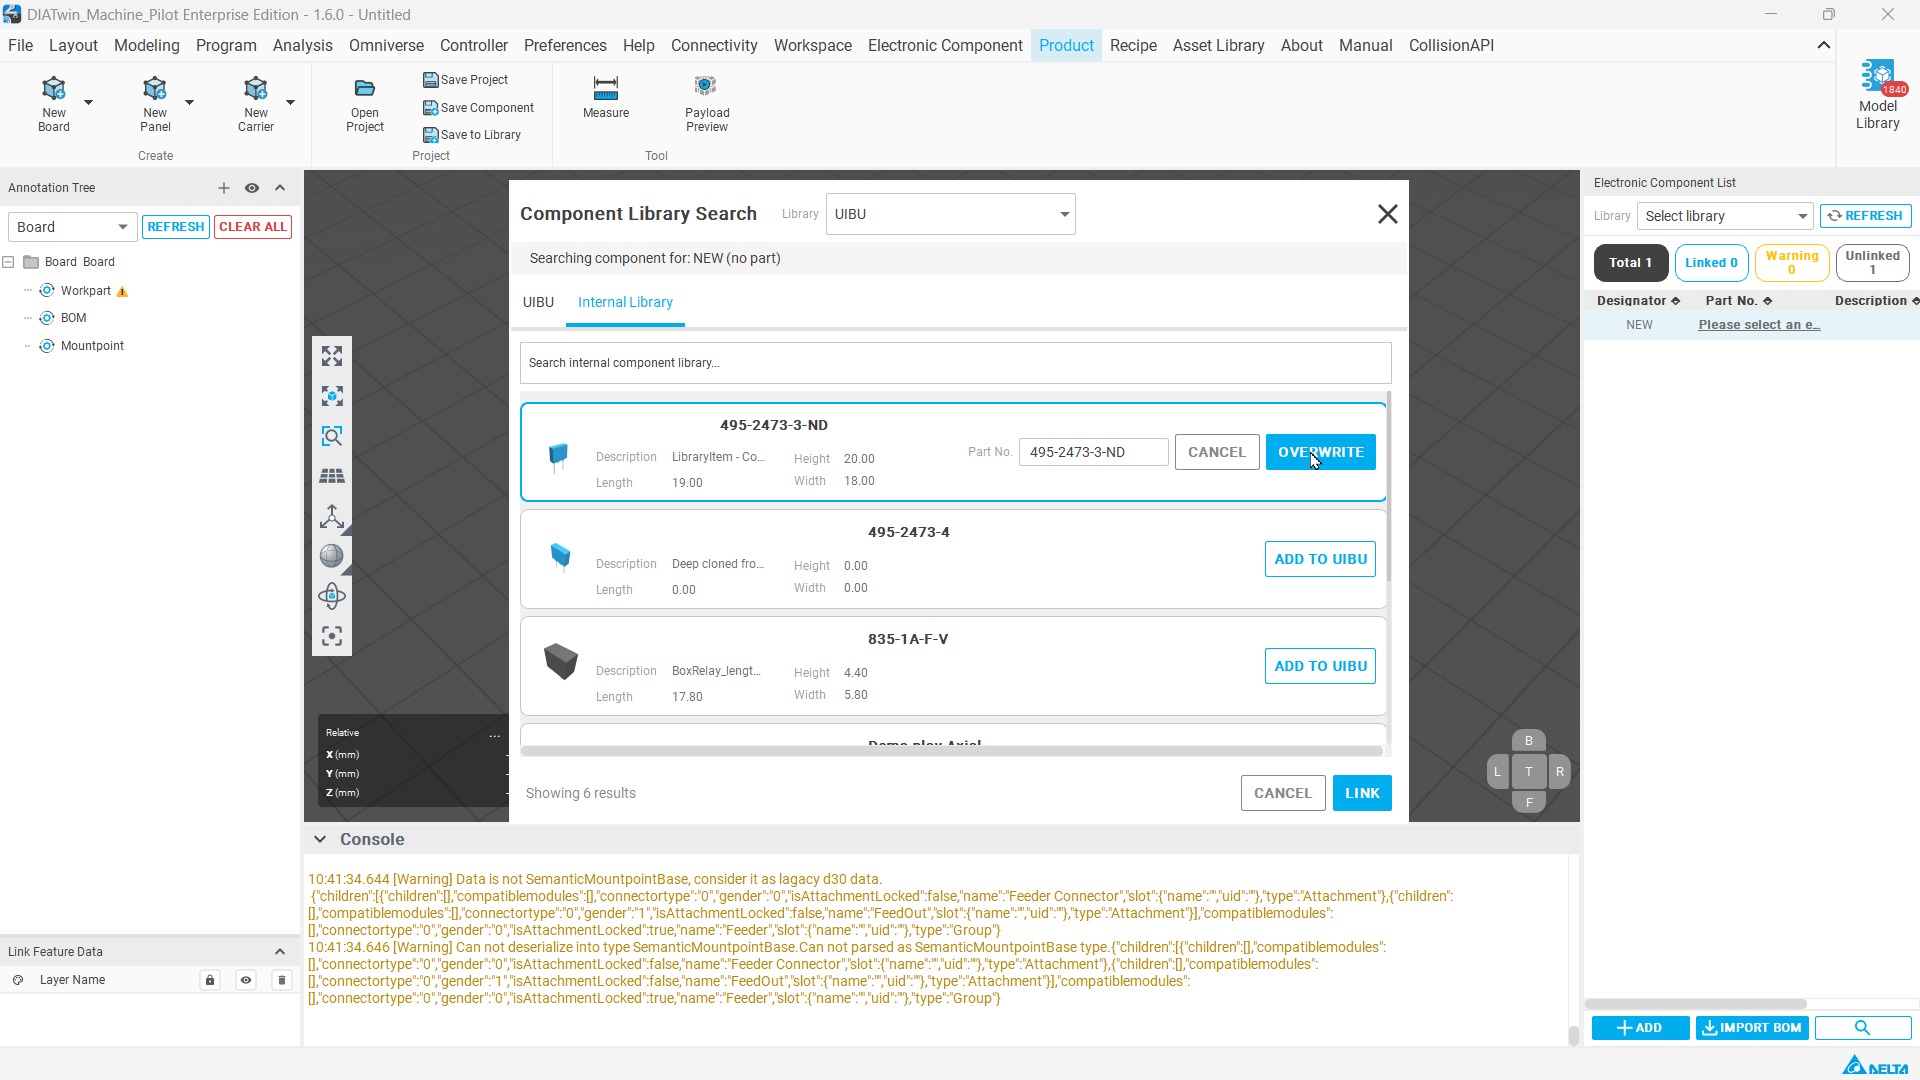
Figure E01-5: The target shows Part No. and OVERWRITE; other assets below still show ADD TO UIBU
Step 08 | Enter a new part number
In the target asset's Part No. input field, change the original value to 9999 . Check the entry before submitting. You may use your own new part number for practice.
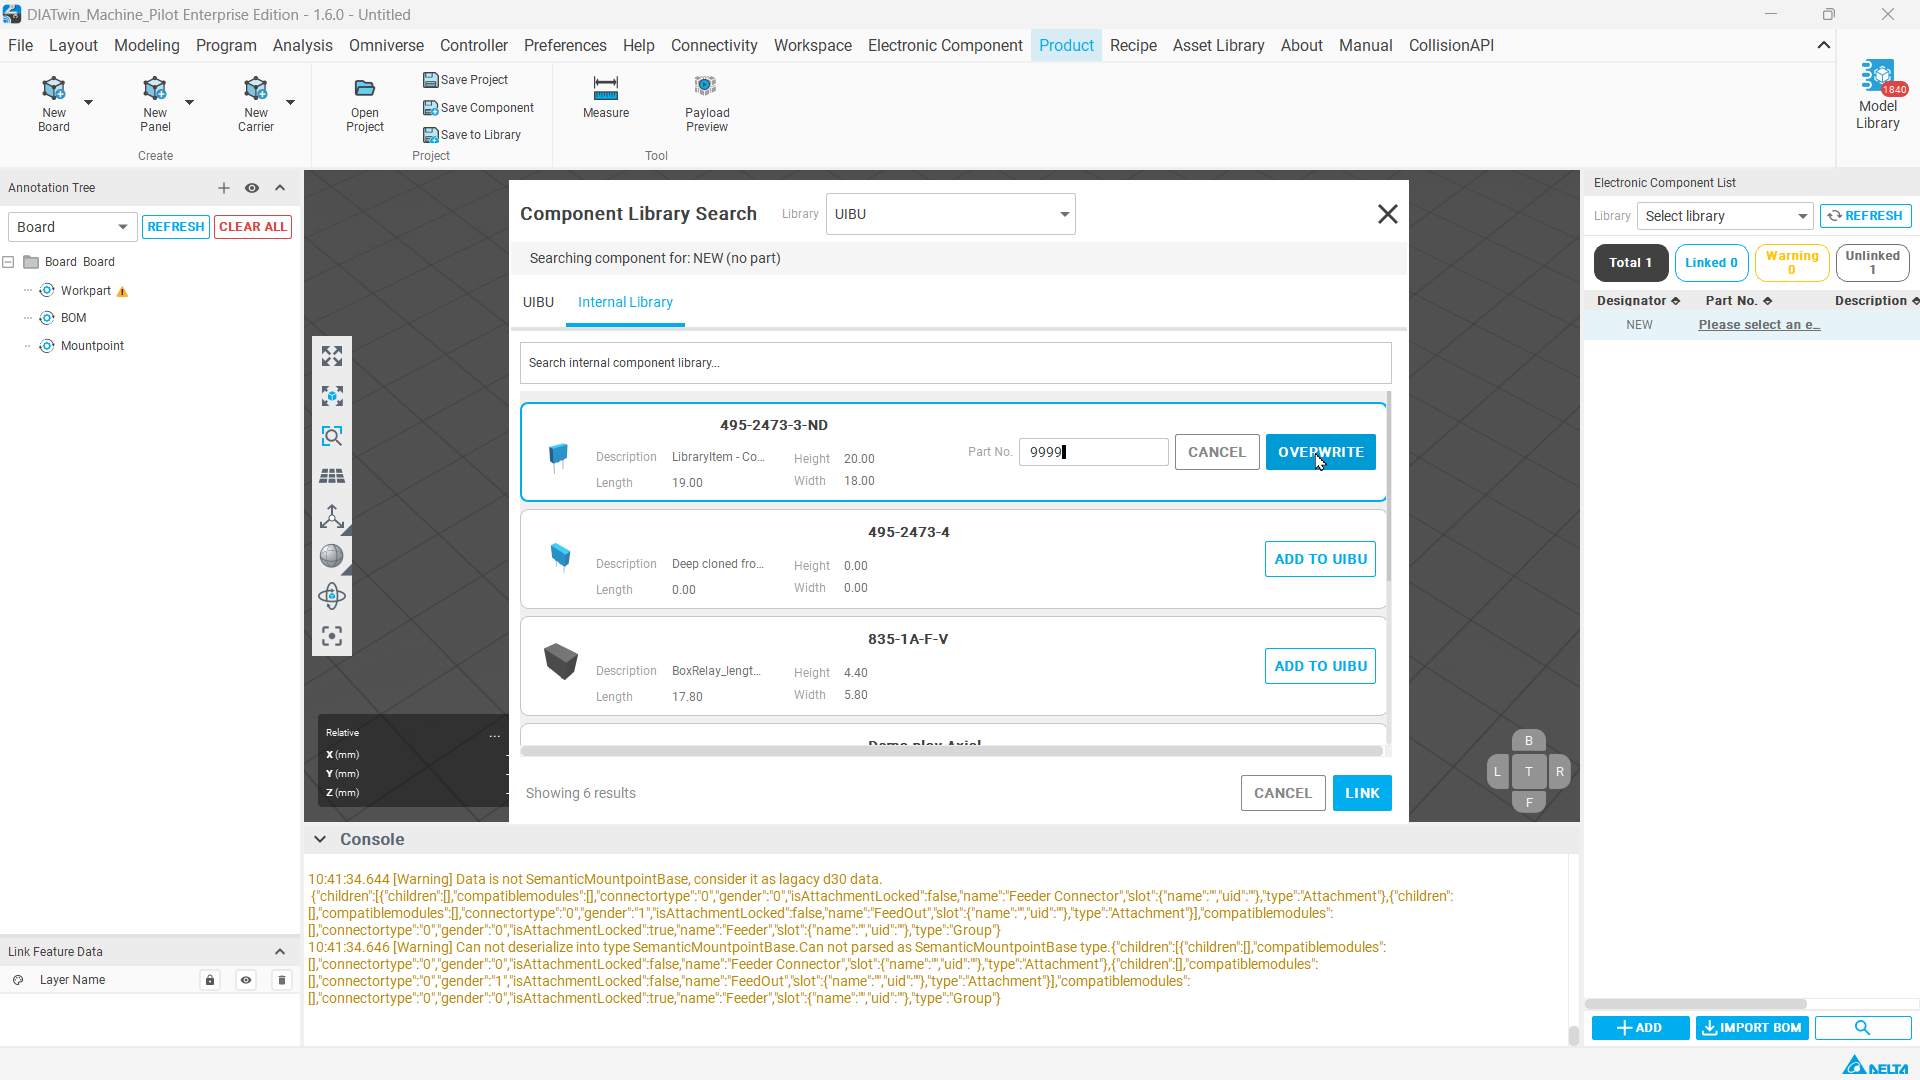
Figure E01-6: The new part number is entered; OVERWRITE must still be selected to submit it
Step 09 | Submit the update
On the same item, select the right-hand OVERWRITE . Confirm that the following appears: Component overwritten in library. message.
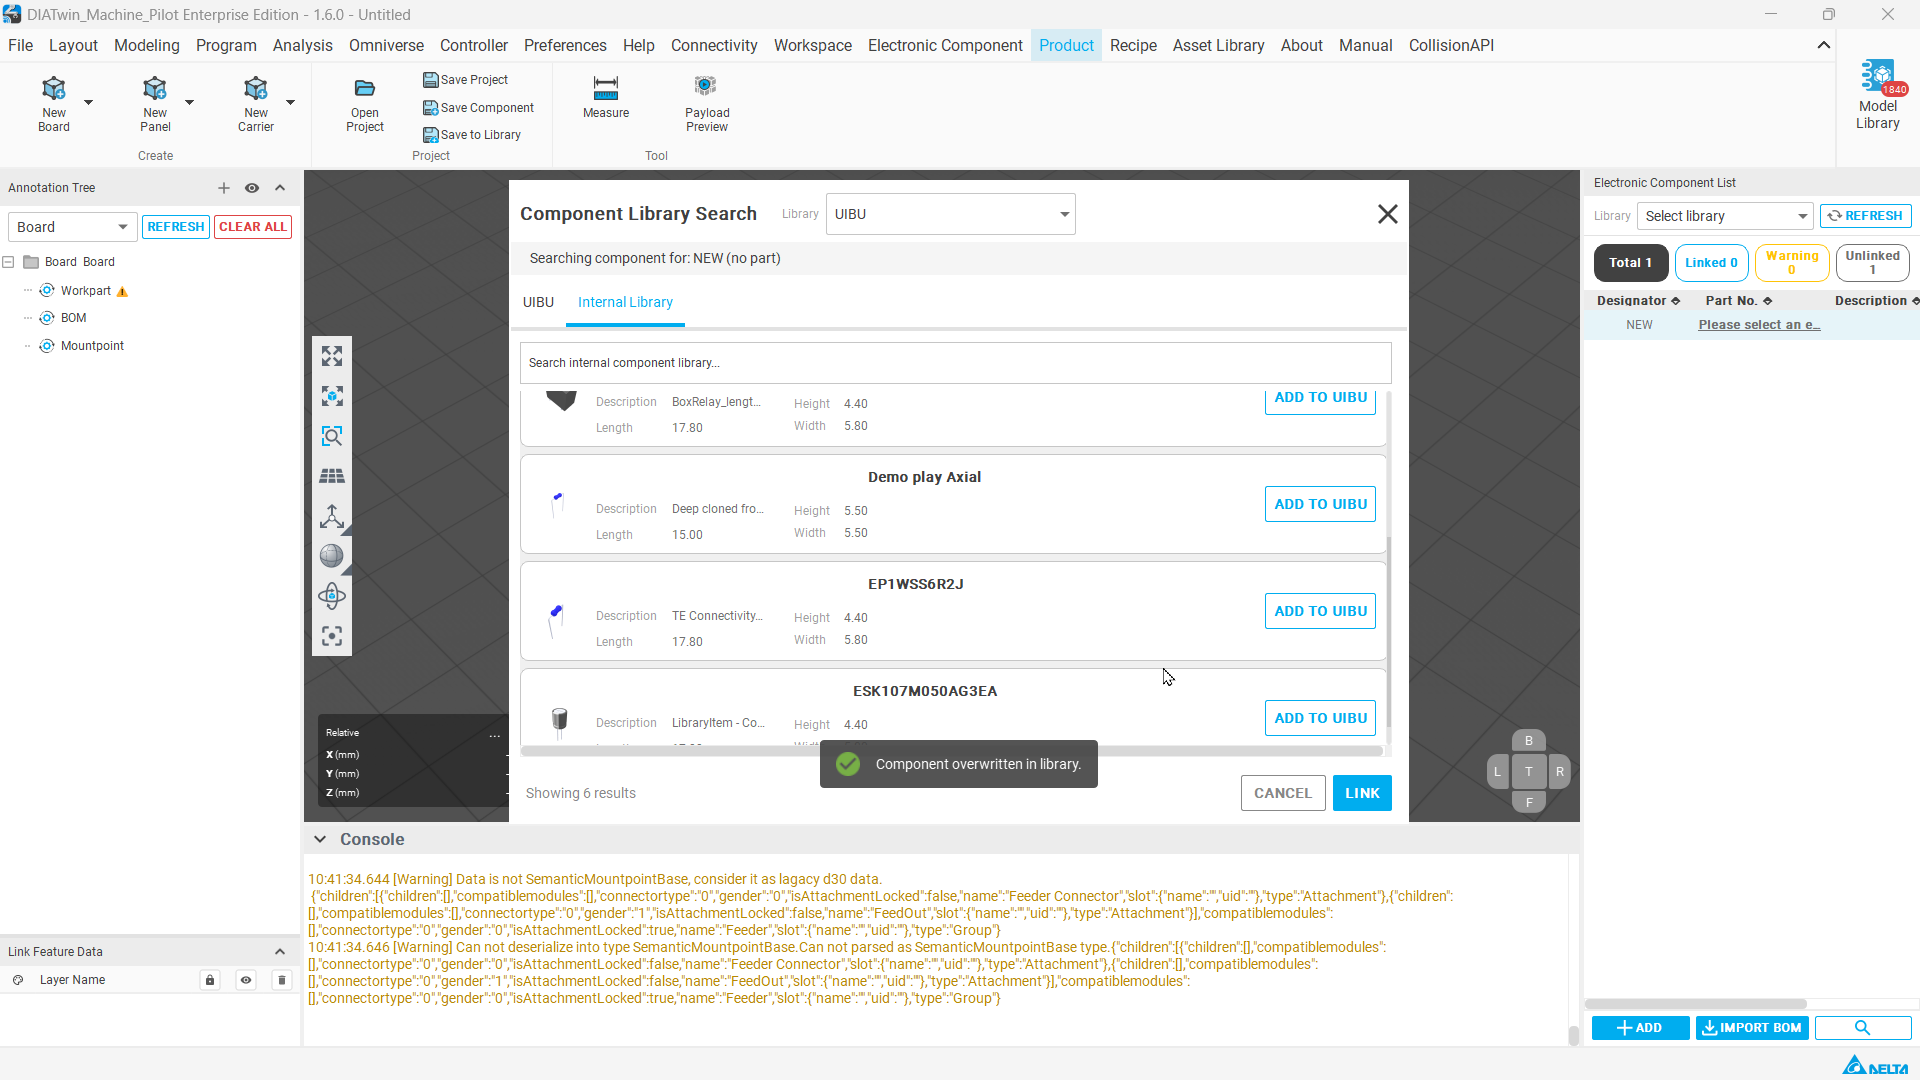
Figure E01-7: Part-number update confirmation
4. Return to the list to check the result
Step 10 | Find the new part number in UIBU
At the top, select the UIBU tab, find the blue rectangular capacitor again, and check:
- The part number above the item displays
9999or your chosen new value. - The shape is unchanged.
- In this example,
Namestill displays495-2473-3-ND; Name remaining unchanged does not mean the part-number update failed.
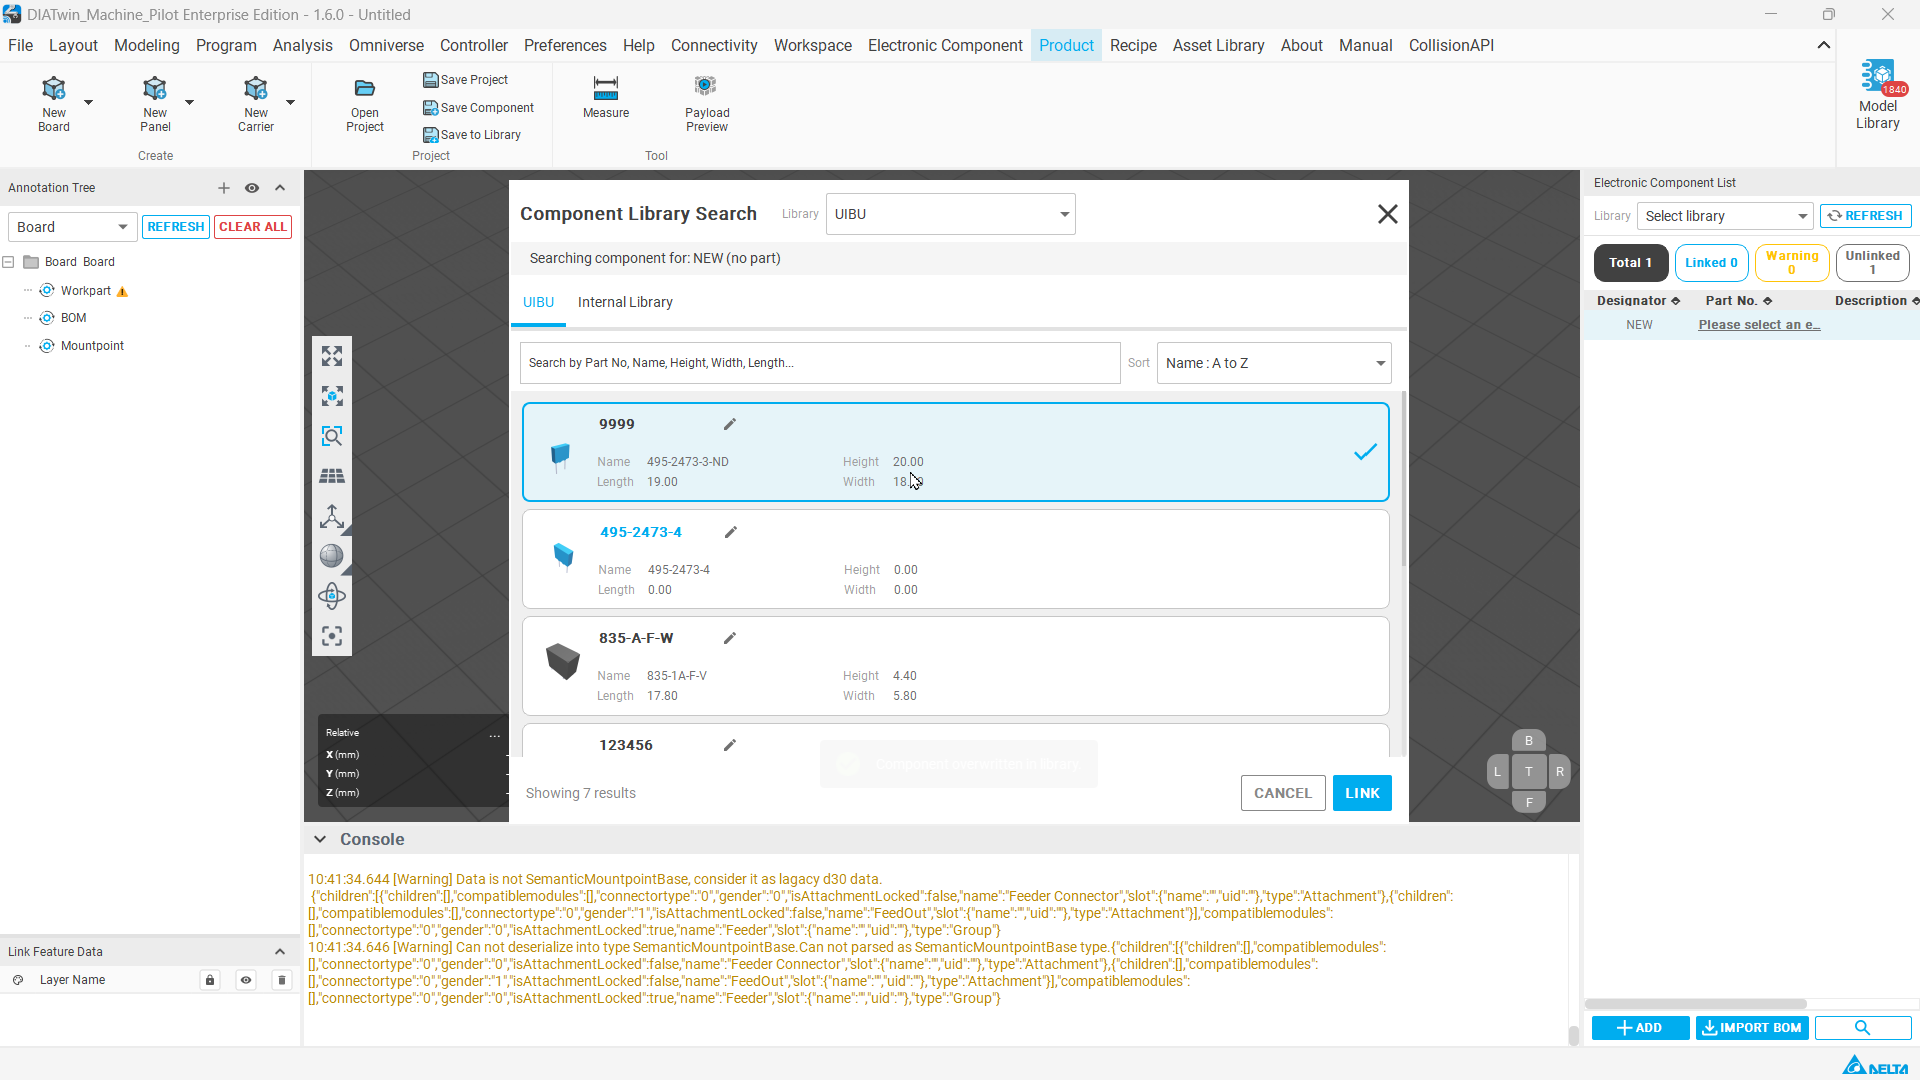
Figure E01-8: Part number updated to 9999; asset name unchanged
Completion checks
Check each item for this part-number editing exercise:
- [ ] Identify the selected shape and original part number before editing.
- [ ] See the success message when submitting the update.
- [ ] Find the same shape in UIBU with the new part number you entered.
- [ ] Distinguish Part No. from Name; do not treat an unchanged Name as a failure.
- [ ] Explain why Deep Clone is needed to keep two part numbers with the same shape, rather than repeatedly editing one asset.
If the task requires lookup only, finding a matching shape and part number completes it. Do not change the asset merely for practice.
If your screen differs from the example
| Condition | How to check |
|---|---|
| The new part number in UIBU differs from the intended value. | Check the selected asset and submitted value; do not mark the task complete yet. |
| Name still contains the old part-number text. | Check the part number above the item; Name and Part No. are separate information in this example. |
| The asset with the same shape cannot be found. | Check that the practice data is available. Do not substitute a different shape as the result of this edit. |
Practice and Completion Check
Complete the procedure using the starting data for this course. Check your result against the completion criteria, example values, and operating conditions.
Download English Training Kit (ZIP)