 DIATwin
E02 | Reuse a Shape to Create Another Part Number
Purpose and expected result
Use Deep Clone to retain the original asset and create a new part number with the same shape. After completion, find the new part number and corresponding shape in the component list in Product.
Before you start
Prepare an existing component to clone. This example uses a blue rectangular capacitor. Check the shape before selecting it; this task does not modify the shape, tool relationships, or feeder relationships.
Example values and adjustable items
| Item | Example value | Adjustment principle |
|---|---|---|
| New asset / new part number | 495-2473-4 |
You may choose a name; the group part numbers and later lookup value must match. |
| Group | Internal Component Group, UIBU |
Keep the example settings |
| Component shape | Blue rectangular capacitor | Must be the shape you intend to reuse |
Procedure
Step 01 | Open Deep Clone
Select Electronic Component . Expand the New Component drop-down list and select Deep clone from asset....
Check after the operation: The Select Asset to Deep Clone window appears.
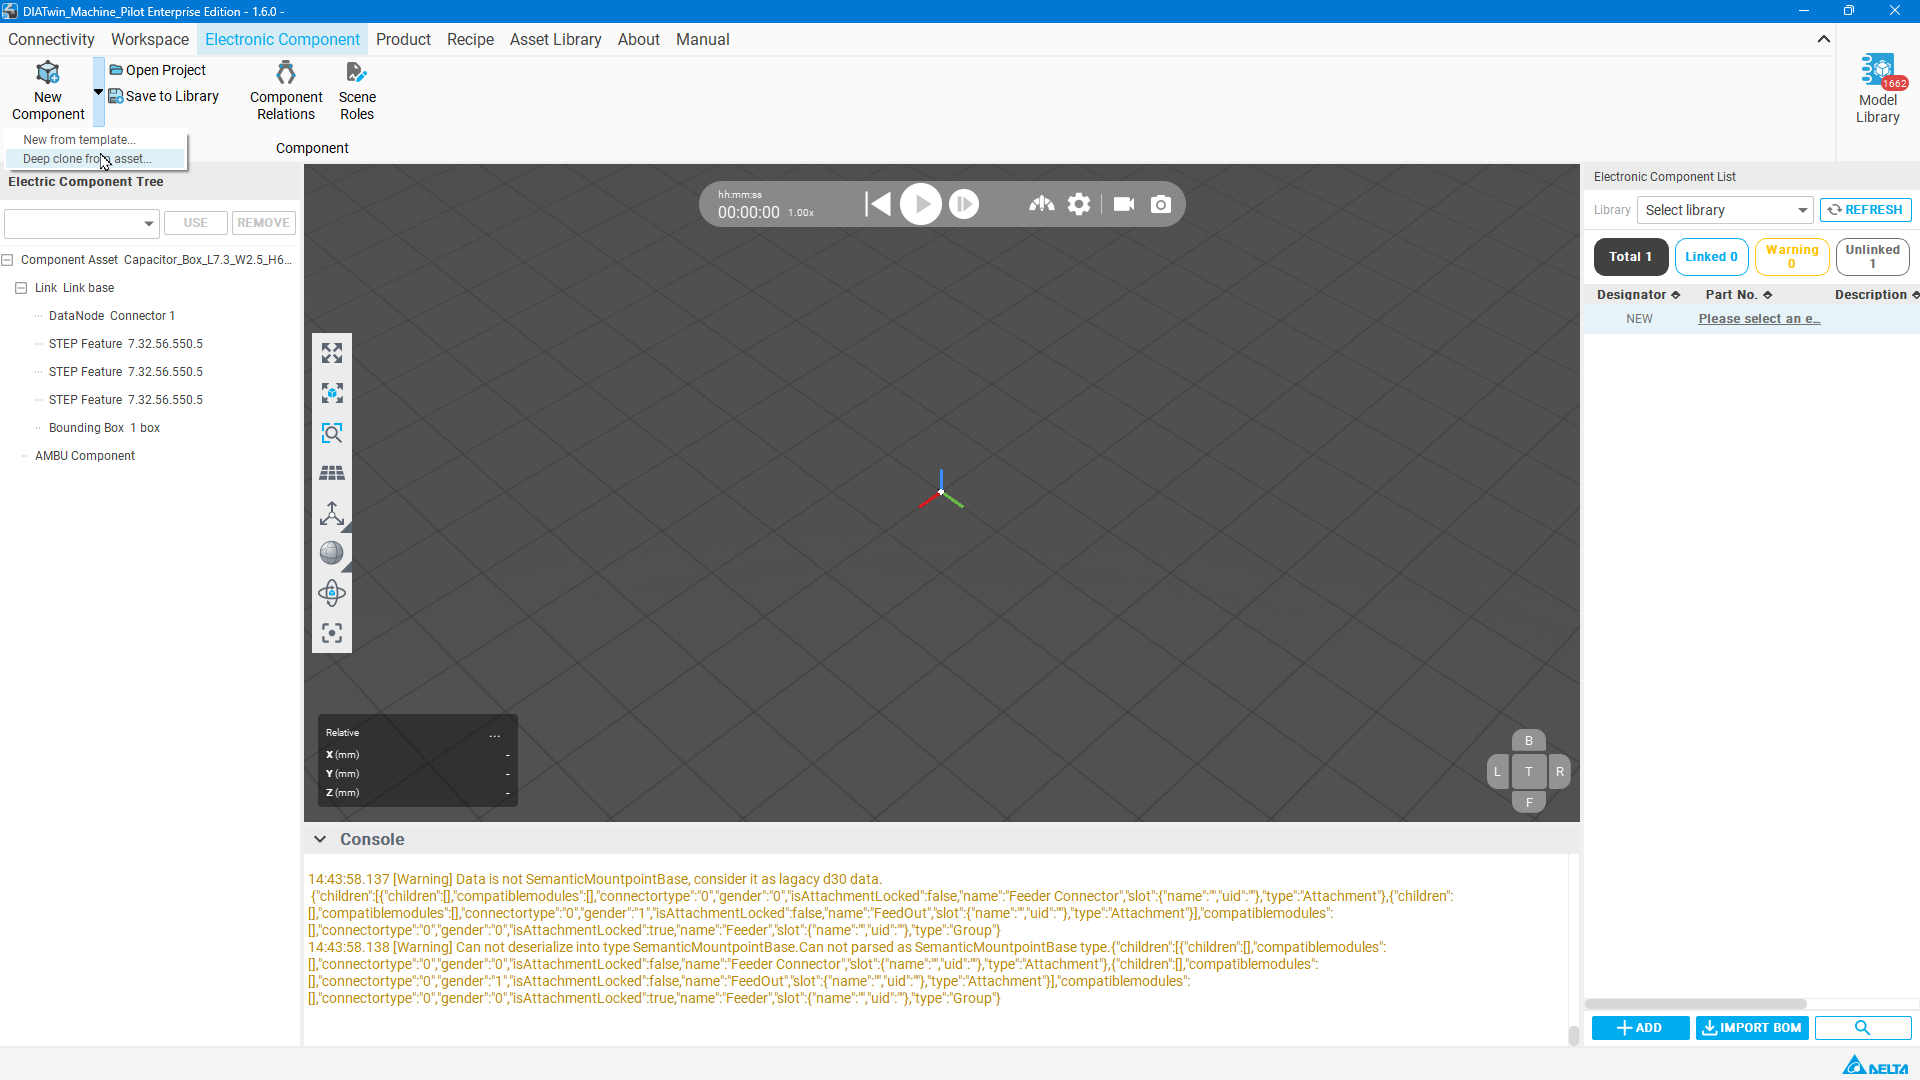
Figure E02-01: Open Deep Clone
Step 02 | Select an existing shape
Set the group to All groups , browse the thumbnails, select the blue rectangular capacitor, and select OK.
Check after the operation: The selected shape is the component you intend to reuse.
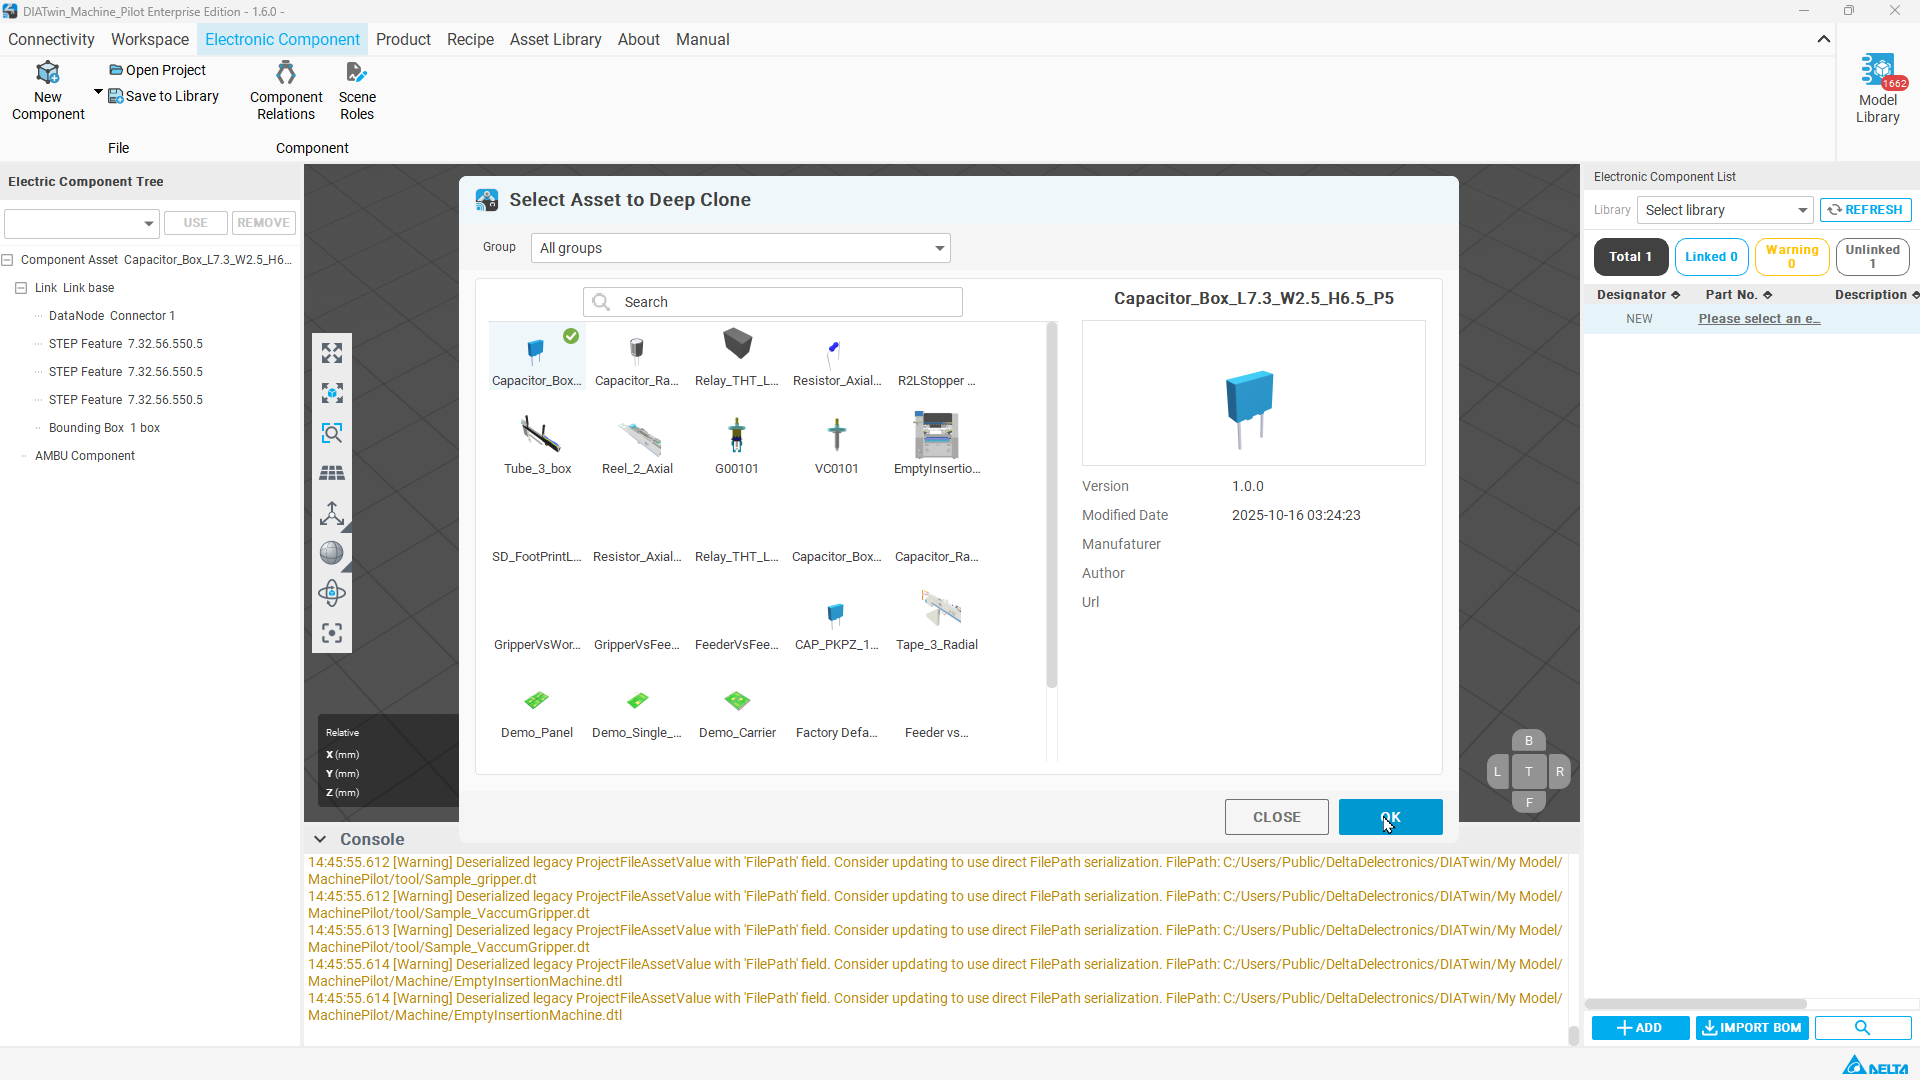
Figure E02-02: Select an existing shape
Step 03 | Set the new name and group part numbers
In Confirm Deep Clone Check the new asset name and enter 495-2473-4 ; in the group list, for Internal Component Group and UIBU enter the same new part number in the corresponding fields, then confirm.
Check after the operation: The new name and both group part numbers match the intended new value.
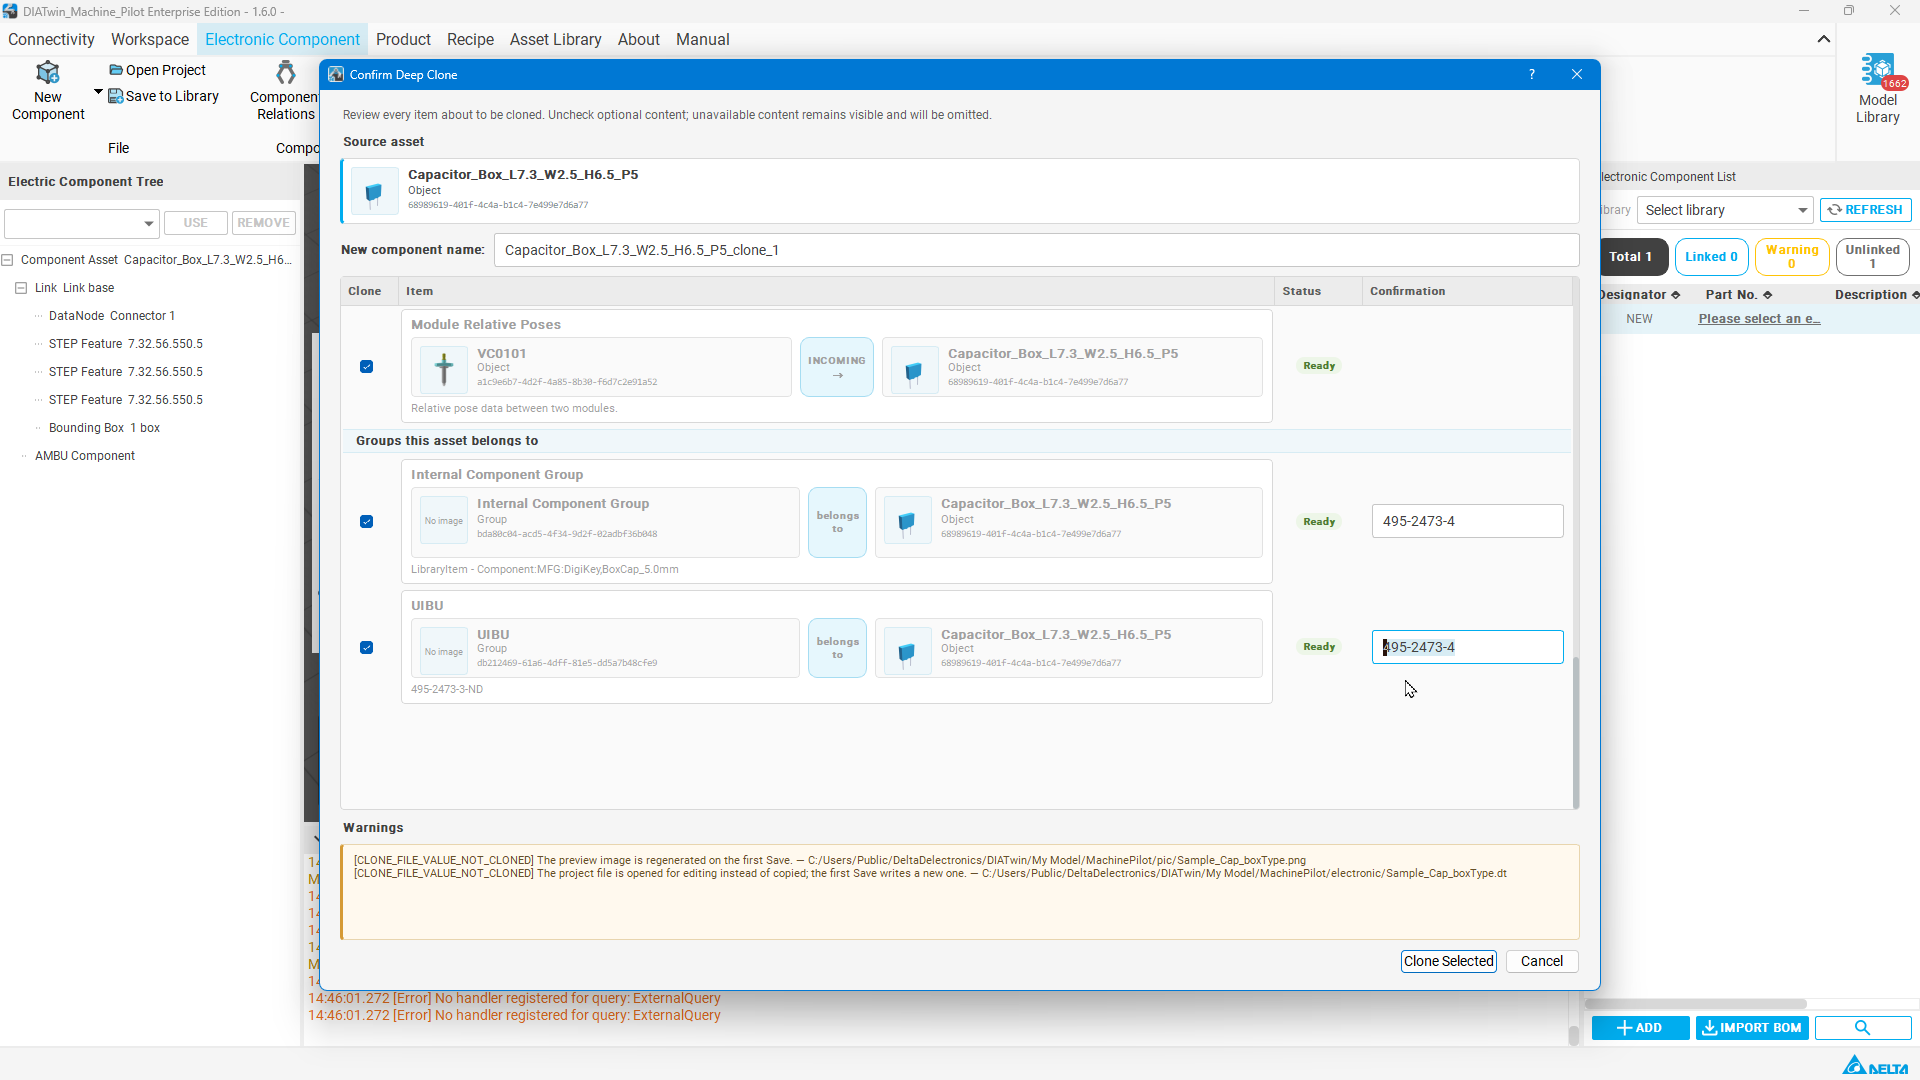
Figure E02-03: Set the new name and group part numbers
Step 04 | Read the cloning notice
Read the Deep Clone from Asset notice, then select OK to return to editing the cloned asset. The preview and project file still require the first save.
Check after the operation: The cloned asset is open for editing; this does not yet mean it has been saved.
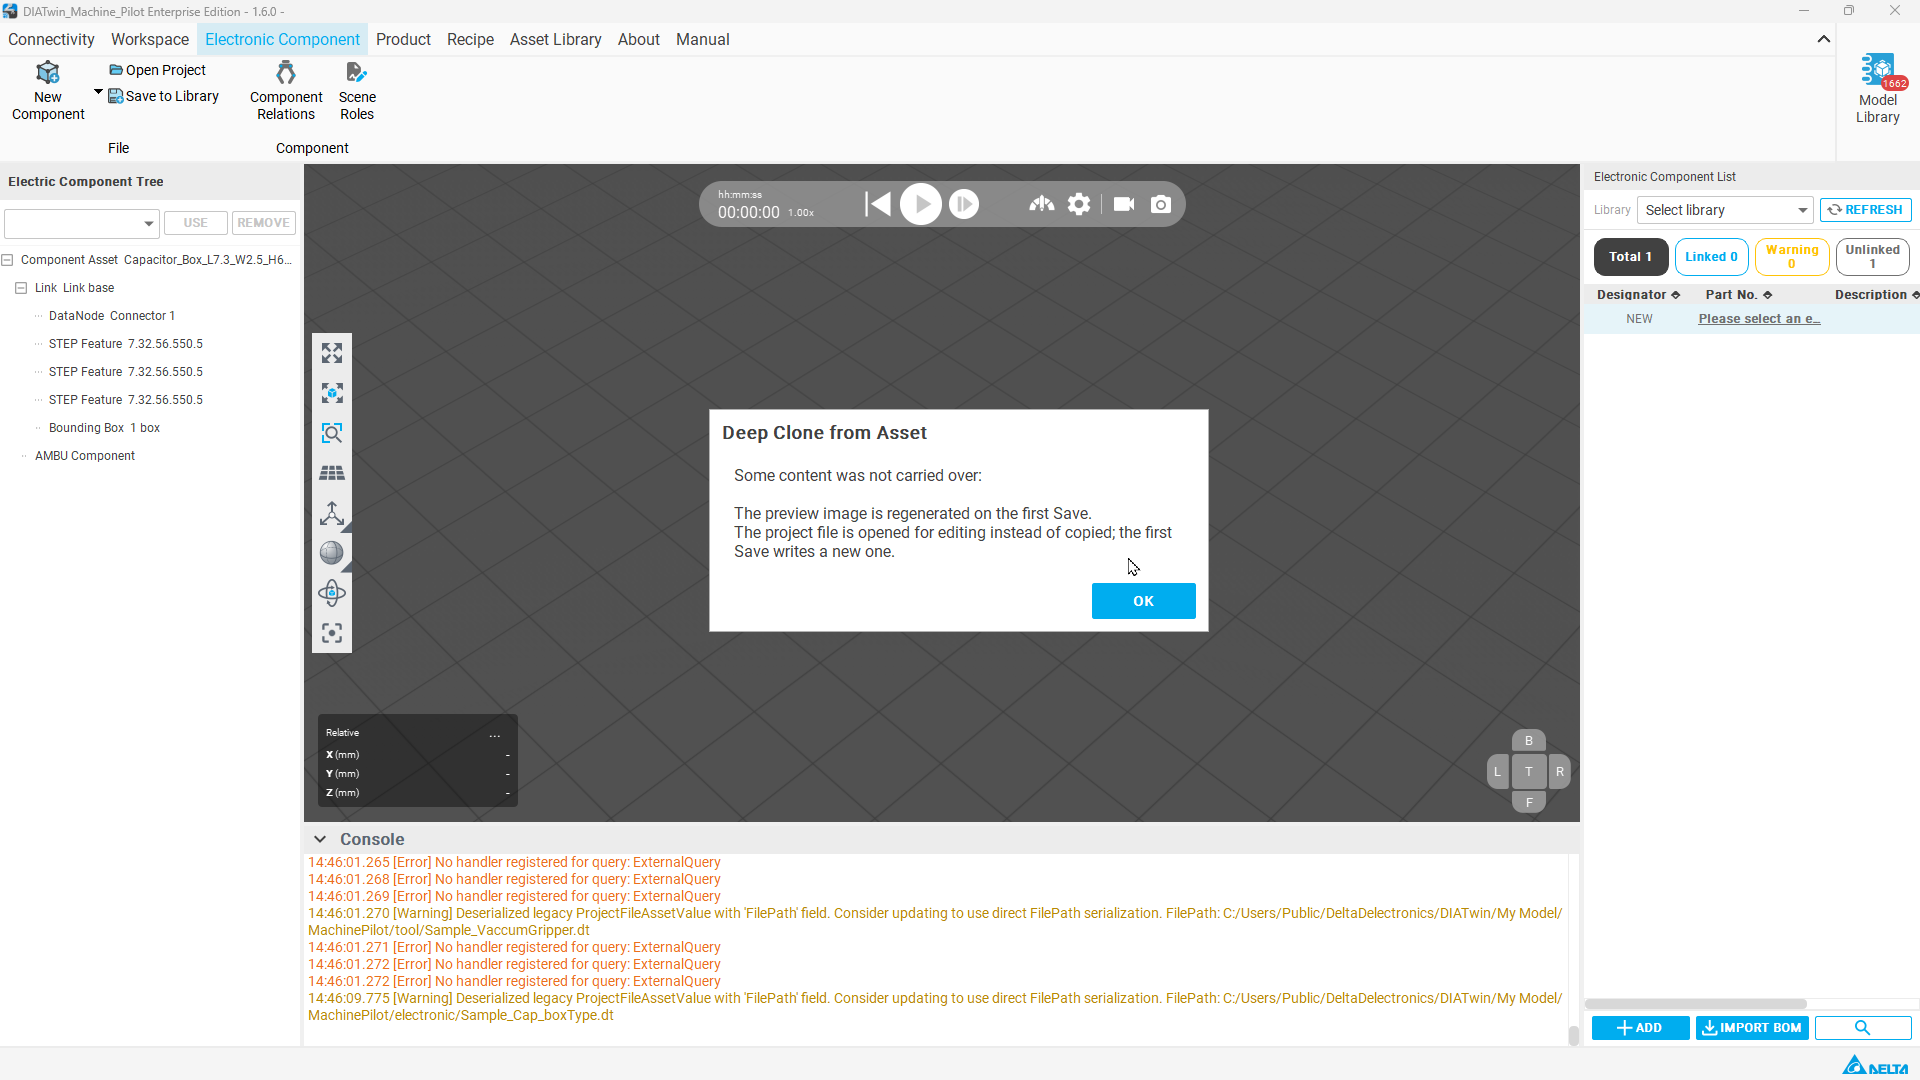
Figure E02-04: Read the cloning notice
Step 05 | Add the AMBU Component property
Right-click the cloned asset's root node and select Add AssetValue under AMBU Component.
Check after the operation: AMBU Component can be selected under the root node.
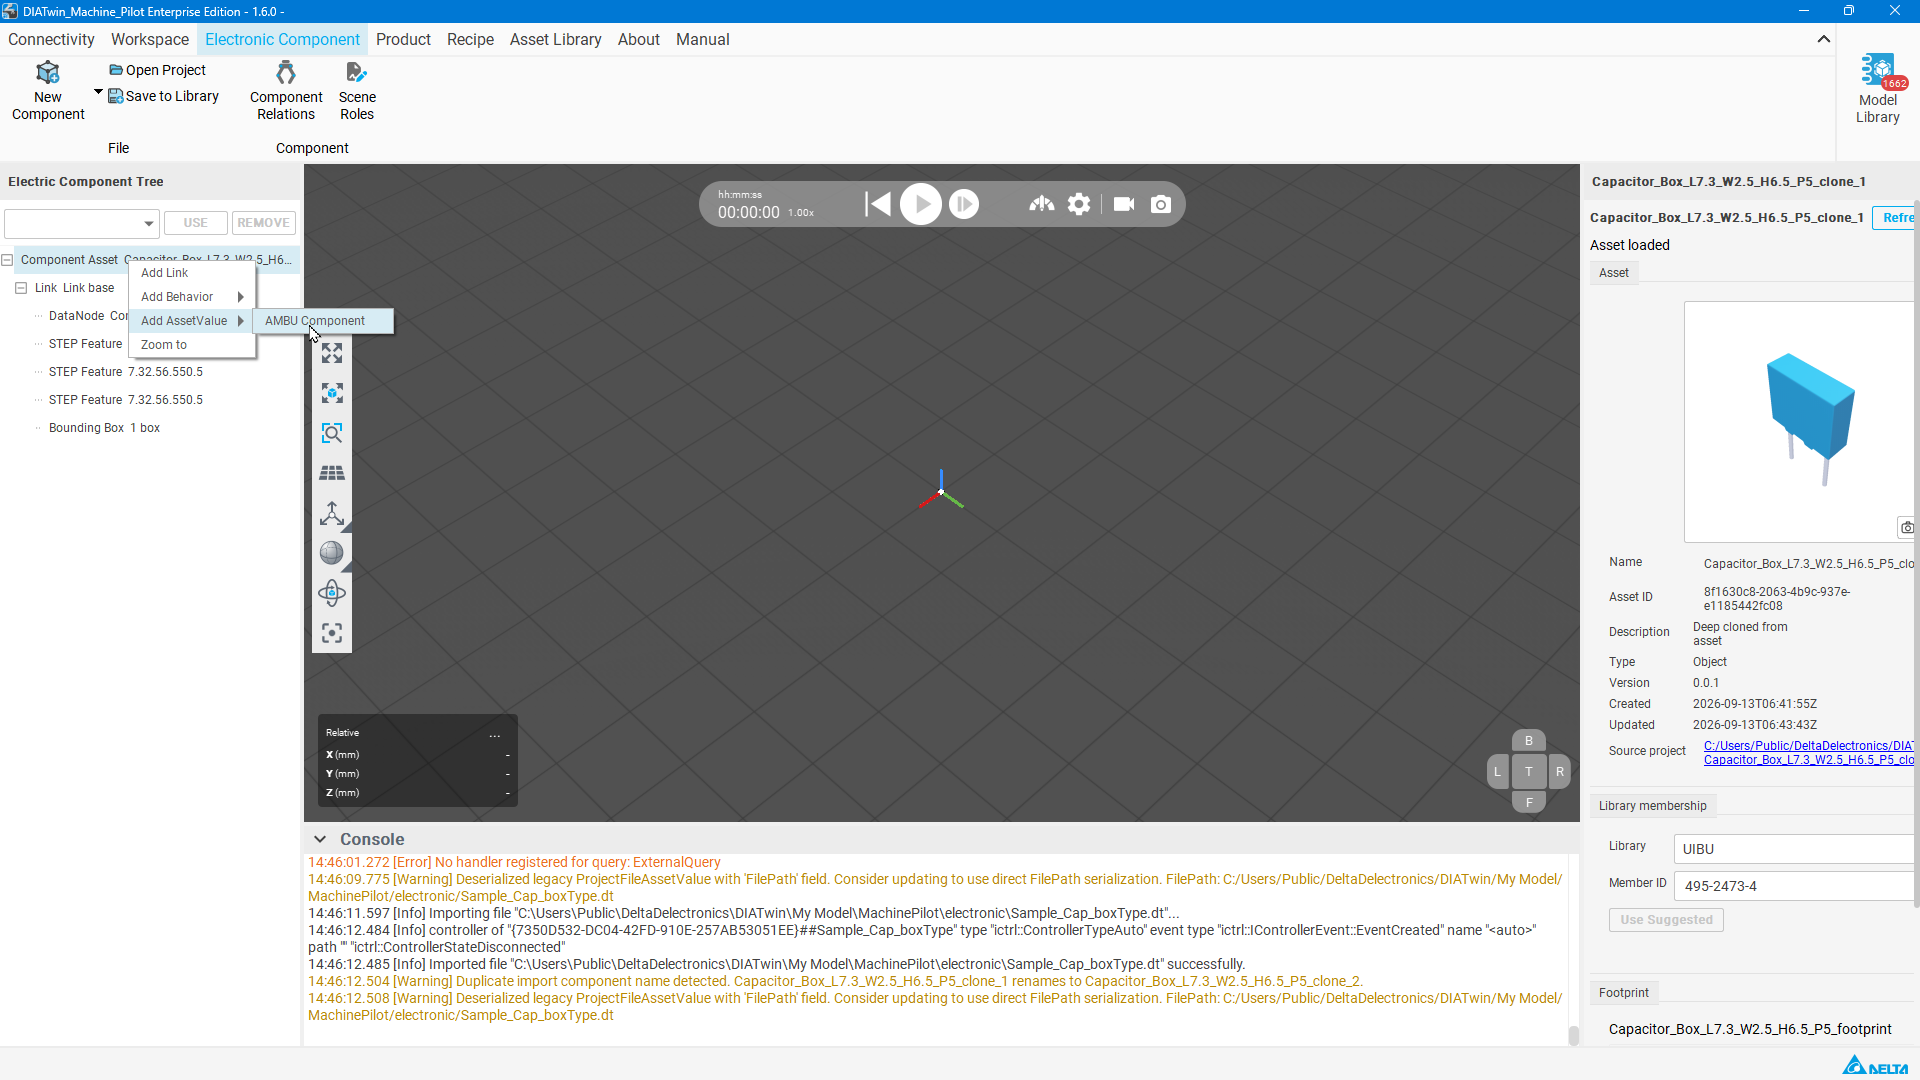
Figure E02-05: Add the AMBU Component property
Step 06 | Check component name and part number
Select AMBU Component and on the right set Component name and Part Number to 495-2473-4.
Check after the operation: Both fields match the new part number.
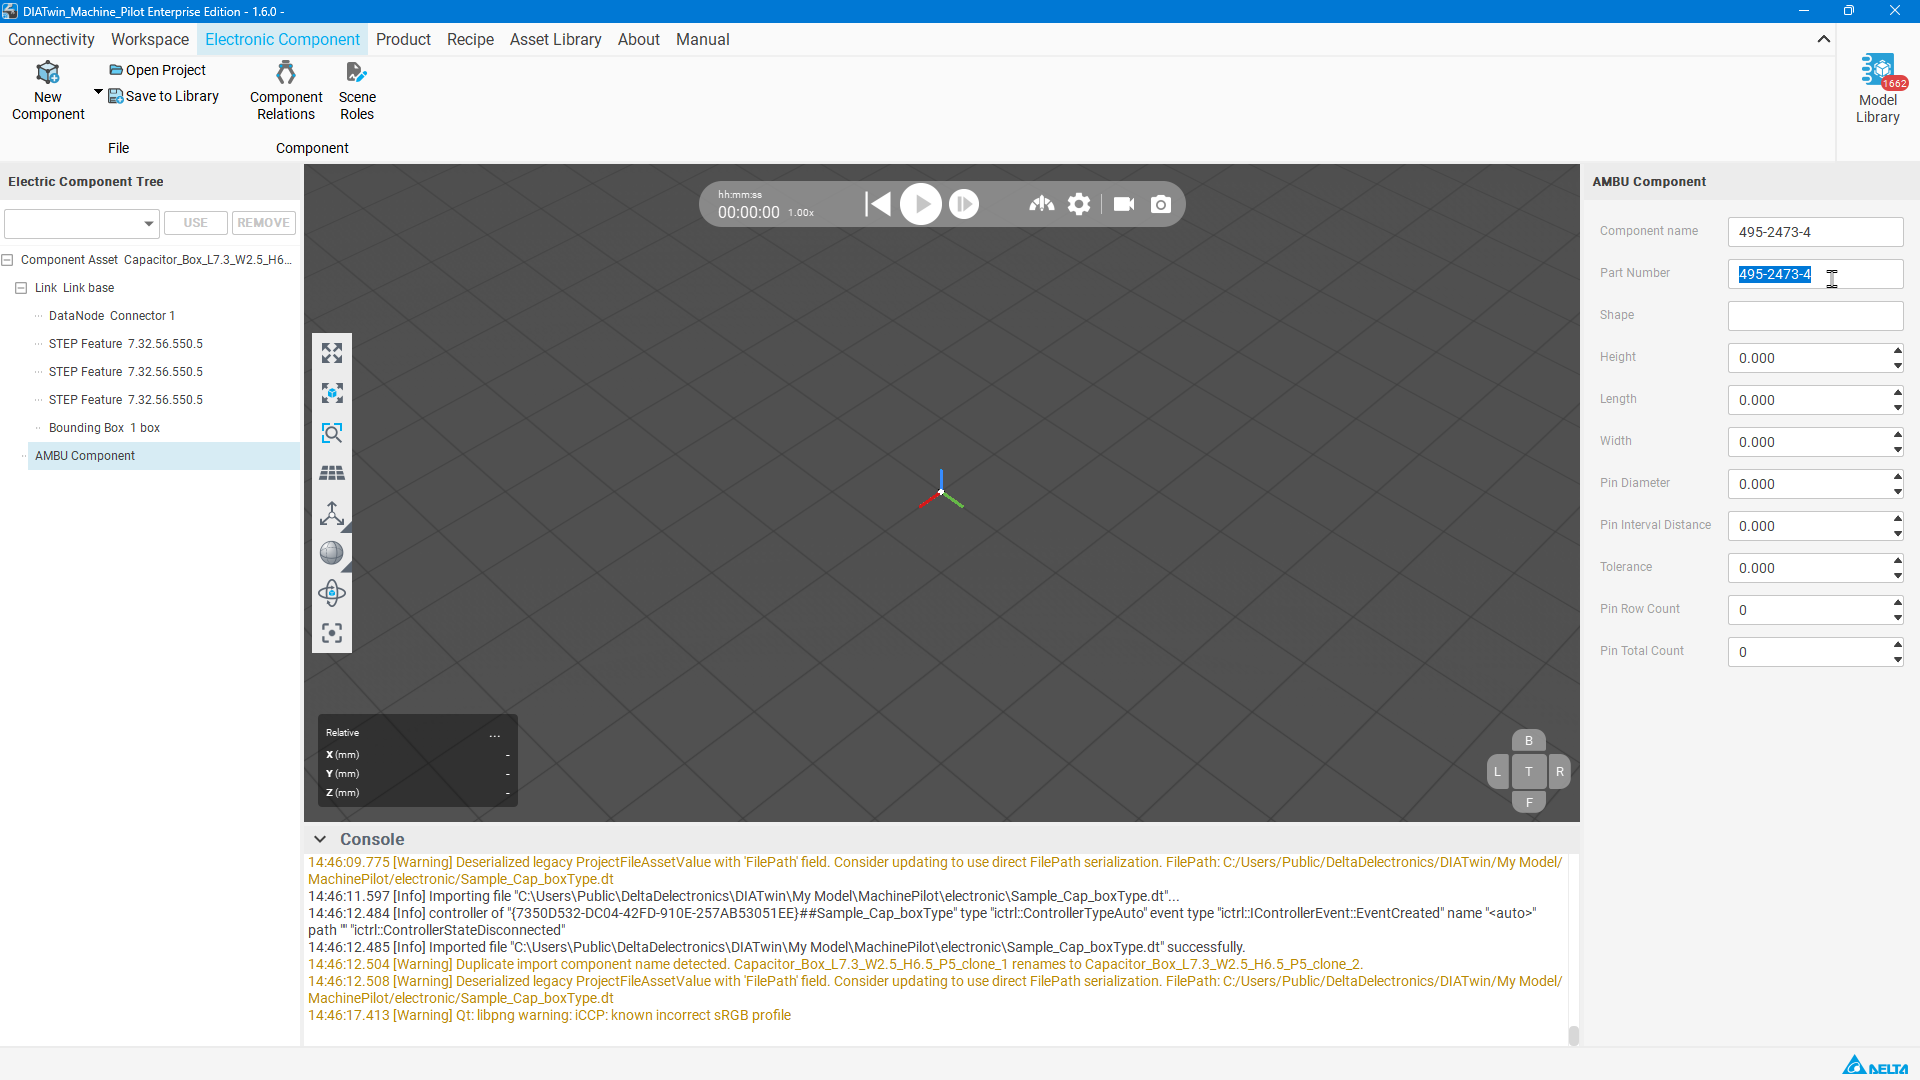
Figure E02-06: Check component name and part number
Step 07 | Save the cloned asset
Select Save to Library and check Name, save location, and group part numbers. In Preview, select Capture from 3D view , confirm that the cloned capacitor shape is shown, then select OK.
Check after the operation: The preview matches the new asset and the save has been submitted.
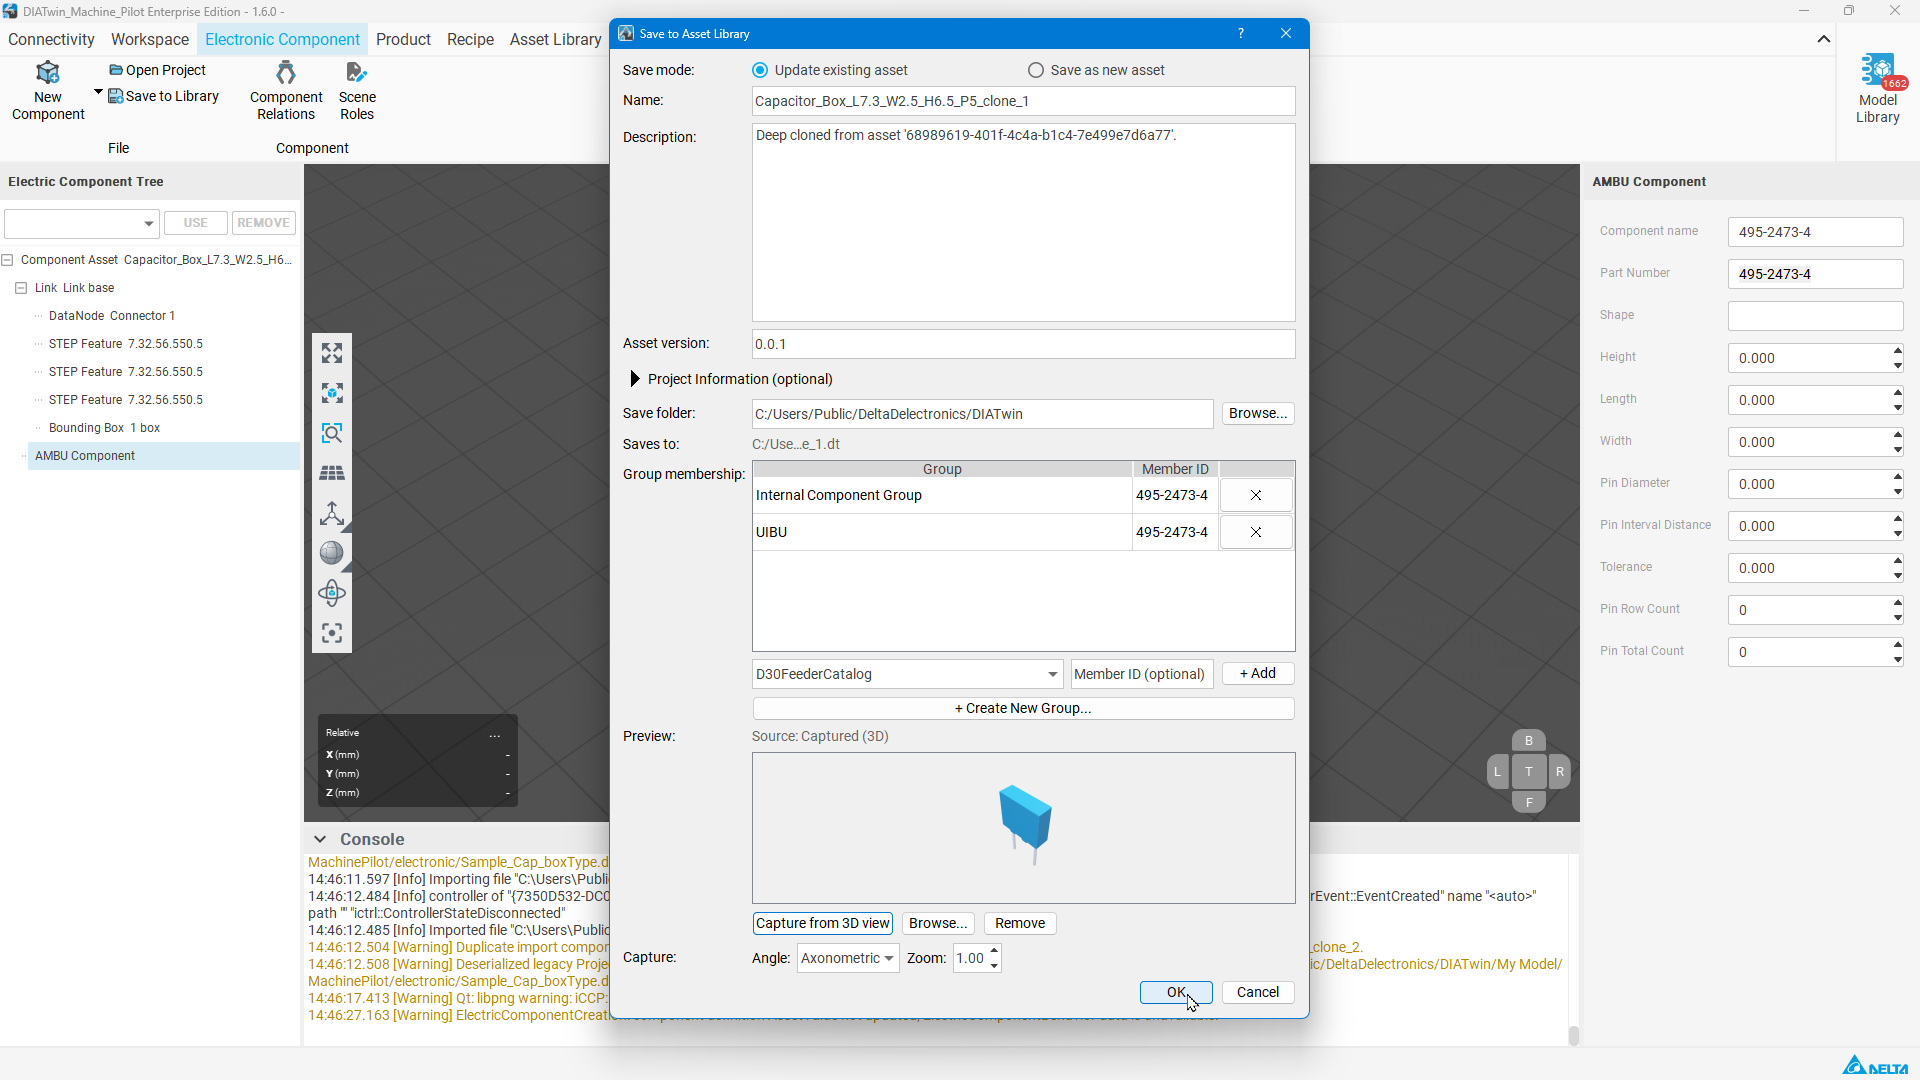
Figure E02-07: Save the cloned asset
Step 08 | Return to Product to find the component
Switch to Product and add a Board. Select BOM, select + ADD , then use the new item's Part No. link to open Component Library Search. In UIBU, find 495-2473-4.
Check after the operation: The list shows the new part number and corresponding capacitor shape.
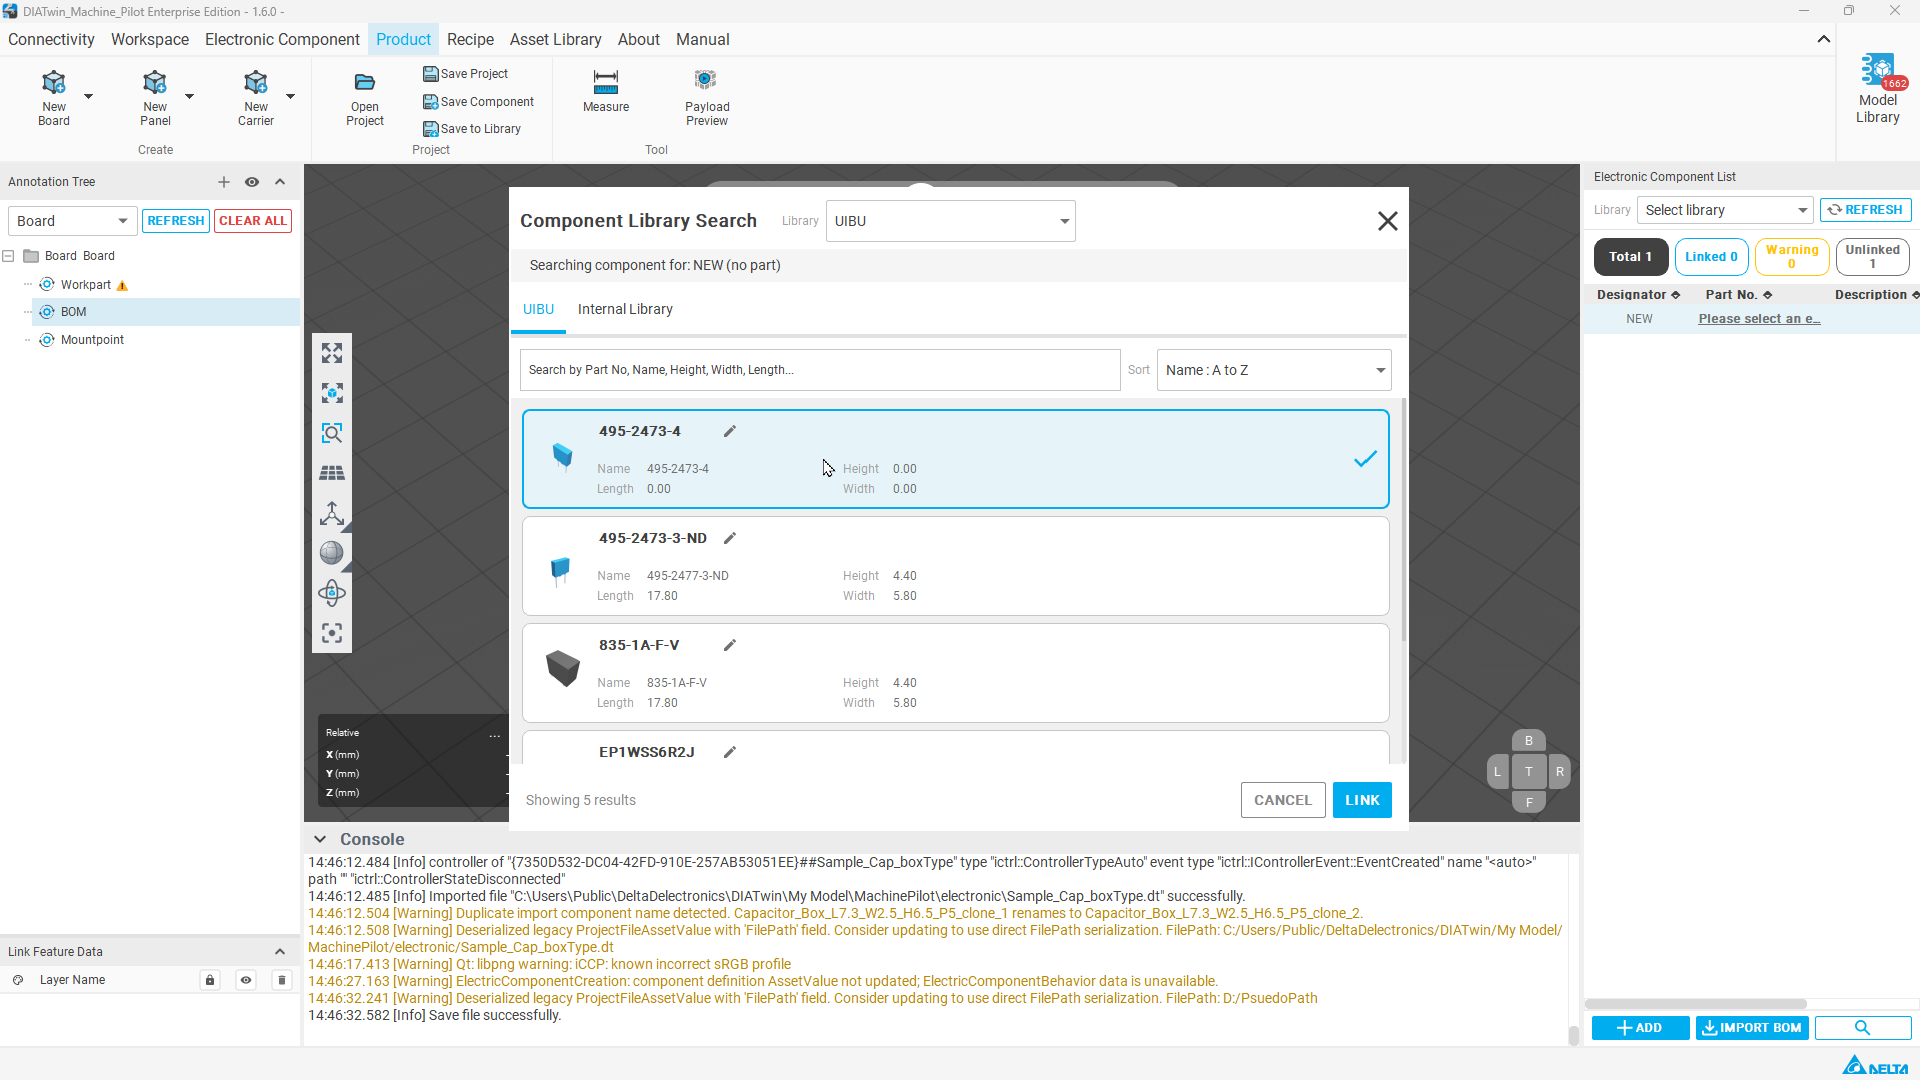
Figure E02-08: Return to Product to find the component
Completion checks
- [ ] The new part number matches your setting.
- [ ] The new part number can be found in Product's UIBU list, with the intended cloned shape.
- [ ] Explain how this differs from changing an existing part number in E01.
Limitations and notes
A displayed dimension of 0.00 does not represent the physical component size. Check the cloned geometry and properties before use, and reopen the saved asset to verify it.